Since our last van was a bit of an experiment, we didn’t want to spend much on the little bells and whistles. Sure, we could have spent a lot for a professional awning and then moved it to our new van, but what’s the fun in that?!?
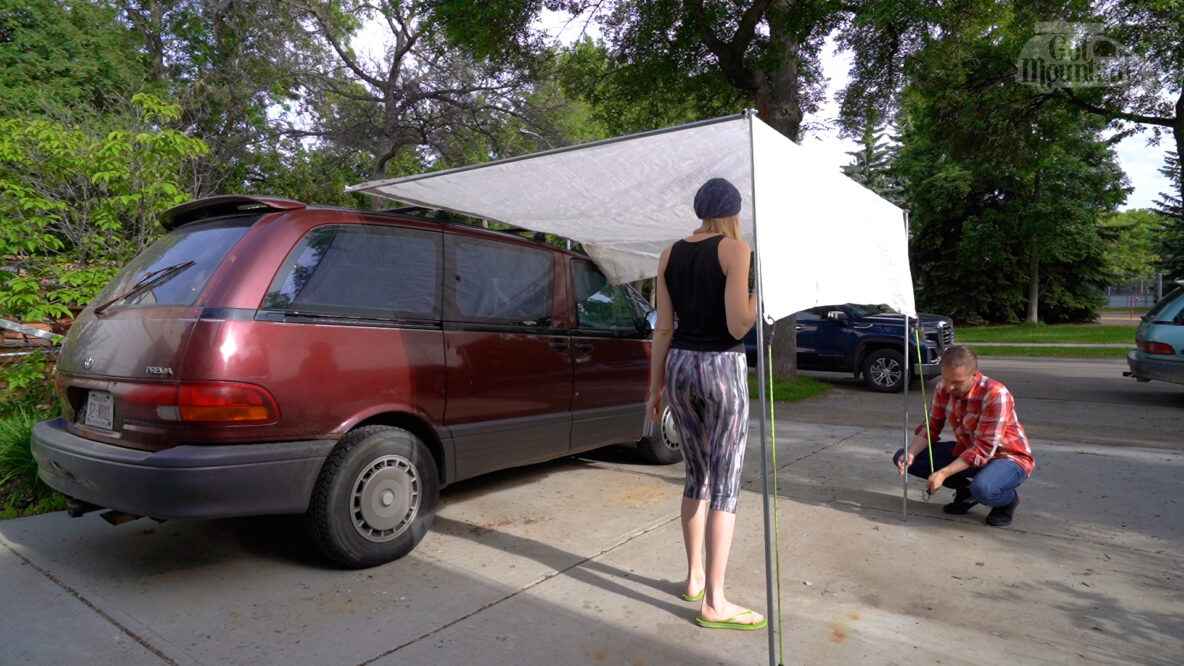
Instead, we decided to build our own. In the end, we are so glad we did. This awning was not only cheap, but can be rolled out in less than 2 minutes, can be tethered down with pegs to withstand decent winds, and can also touch the ground to create a privacy screen if desired. Take a look at the video and you’ll find more details below on how to build it.
Want to build one for yourself? You’ll need:
- A tarp that is the approximate size of your desired awning (I recommend finding the tarp first and building around it)
- 6 x 8′ lengths of 1/2″ EMT electrical conduit (see Step 1 to determine if you want different lengths of conduit)
- 2 x 2″ long 1/4″ carriage bolts (or other bolts if not mounting to a similar roof rack)
- 6 x 2″ long 1/4″ bolts
- 8 x 1/4″ nylon locking nuts
- 20 x 1/4″ flat washers
- 2 x bungee cords
Tools you’ll need:
- drill
- 5/16″ drill bit
- center punch
- metal saw (hacksaw or sawzall with metal blade will do)
- a 7/16″ wrench and socket
- file
There are a few things you’ll have to do during this build.
The second is filing off the sharp edges. Conduit can leave razor sharp edges when cut, so filing those edges with a file will save you buying a hand full of bandaids.
Step 1 – Determine the size of your Awning
First is to determine the length alongside the van (from the front of the van to the rear). I decided to make mine 10′ long (based on the tarp that I found), so to do that, make sure to swap 2 of the 8′ lengths in the list above for two 10′ lengths. You can go longer or shorter depending on what you want for coverage.
Next is how far from your van you want your awning to span. I used a whole 8′ length, but considered cutting it down to 4′-5′ as 8′ was much larger than we needed. Remember that you can cut this down later, or replace it with two new longer pieces of conduit if you change your mind.
Last, is to determine how high your awning will be off the ground. Take into account your roof rack height – if you have a hightop or tall van, you’ll have to figure out how to open and close it, possibly needing a small step ladder. Because the top of my van was rather low, I decided to make my legs the same height as my van.
Step – Cut your conduit to length
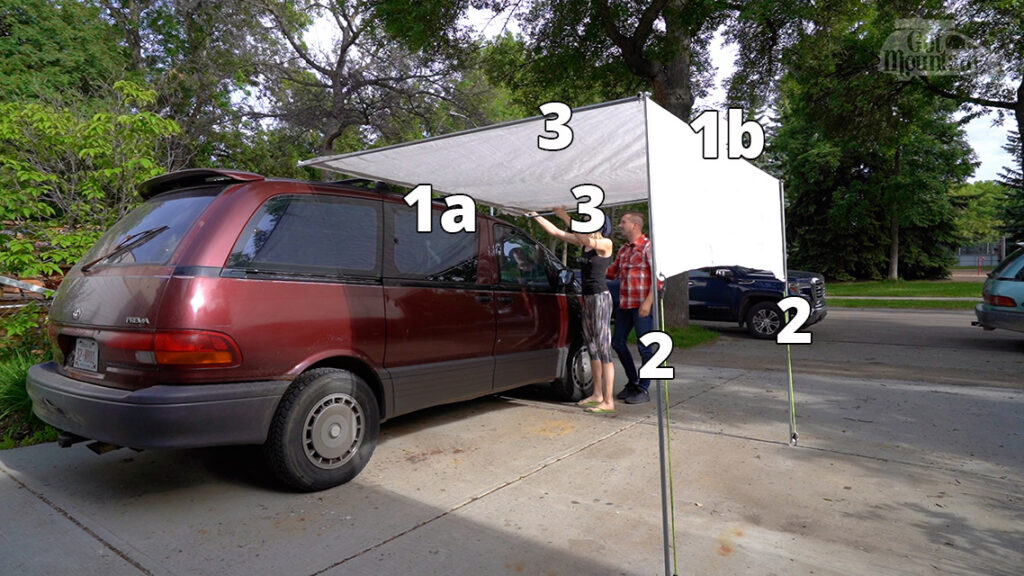
To keep things simple, you’ll have 3 groups of conduit that will be the same length, see figure 1:
- The two longitudinal lengths that run from the front and back of your van, one attached to your van (#1a) and one holding up the other side of the awning (#1b),
- The two legs that hold up the outside of the tarp,
- The two arms that reach from the longitudinal conduit attached to your van to the longitudinal conduit holding up the other side of the tarp.
It’s less important how long each set is and more important that each group is the same length. Number each piece of conduit so you don’t cut the wrong length too short. Mark the conduit and cut all pieces to their correct length.
Step 3 – Drill your conduit
Drilling holes through the conduit can prove challenging, as you need the holes at each end to be parallel to each other. To do this accurately, a center punch comes in handy. Use the center punch to create a small dent where you can place the drill bit. This way you don’t have the drill bit dancing off the conduit when you try drilling through. Just be sure to not flatten the conduit when placing the dent.
When drilling the hole, make sure to leave enough distance from the end so that your awning won’t break if the conduit gets twisted by accident. I left 1/2″ on each end.
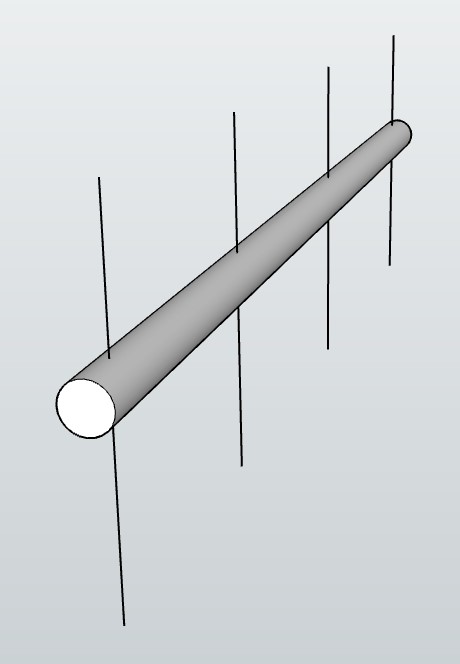
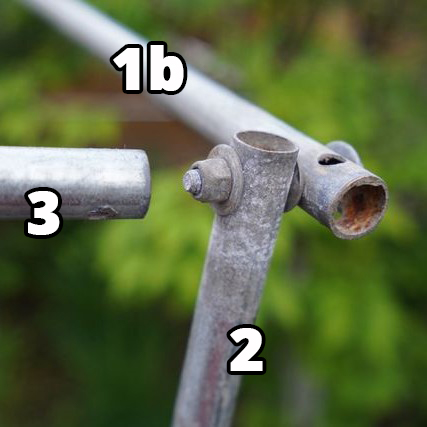
Start by drilling the holes in the center of the conduit that will attach to your roof rack (#1a). Align the conduit on your van, holding it where it will mount to the roof rack. Have someone take a sharpie and mart the spots where it needs to be drilled. This piece will have 4 holes drilled in it – two so it can attach to the roof rack and two to attach the arms. All will be drilled on the same axis of the conduit (see fig 2).
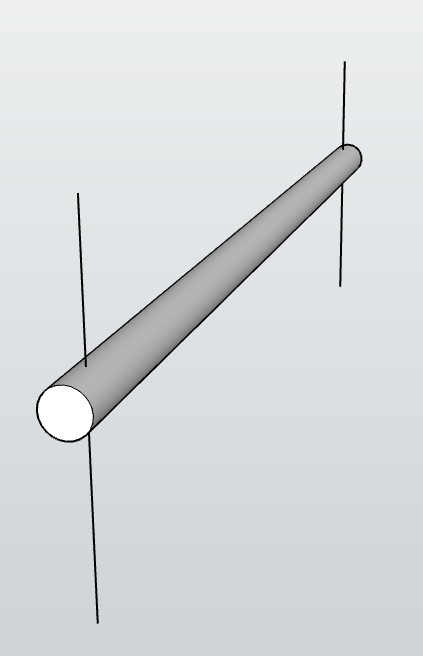
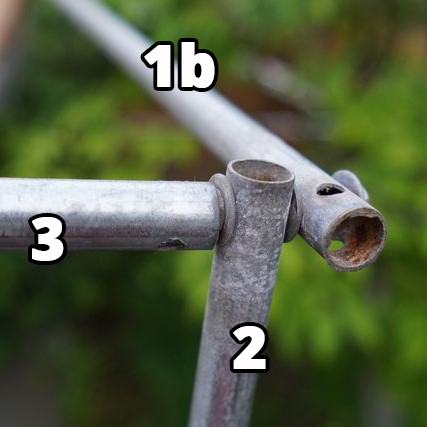
Next, drill the same end holes in #1b. This time, only drilling the 2 end holes, as it won’t need to be mounted to the van (see fig 3).
Once #1a and #1b are complete, drill holes in each leg (#2) and each arm (#3) 1/2″ from one end. Orientation doesn’t matter here as they will only have one hole in each.
Finally, file the sharp edges from the cutting and drilling to make sure you don’t cut yourself. Spray the ends and drilled holes with galvanized paint or primer to keep it from rusting. If desired, you can buy end caps off amazon to plug the holes, but it’s not really necessary.
Step 4 – Bolt everything together

Start with #1a. Take one #3 and bolt it to #1a in the following order (see fig 4):
- Bolt
- flat washer
- #1a conduit
- flat washer
- #3 conduit
- flat washer
- nylon locking nut
Follow this for the other side, as well as to connect #1b to both #2’s. Be sure to place the bolt and nut on the same side as the first, as you’ll generally want them both pointing the same direction. Once you have connected #1a to the arms and #1b to the legs, you are ready to move on.
Step 5 – Connecting the tarp
At this point, you take your tarp and fold it over #1a back on to itself, overlapping by about 2″ (you don’t have to be exact). Tape the edge from one side to the other, being sure to have the tape equally spread over the edge of the tarp and the tarp face you are adhering it to. I even placed a second layer on each side to ensure it had a good bond.
I used Gorilla Tape to connect mine and it seemed to do well. After 3 years, the tape on the leading edge (facing into the wind as I drove) began to come undone. I’d recommend wrapping the front end tightly with a bungie or making a small cap to cover the front when driving to preserve the bond, but replacing the tape is easy if it starts to come undone.
Step 6 – Installing it on your van
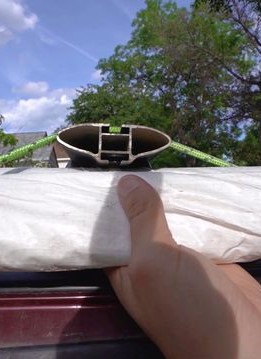
At this point you can pierce the tarp with the carriage bolts in the 2 center holes on #1a. Depending on whether you want to mount it on top or the bottom of your roof rack, you can point the carriage bolts up or down (mine was under my rack, so mine pointed down). Slide the carriage bolts into the roof rack channels (after removing the end caps – see fig 5) and place a flat washer and nylon locking nut on the bottom, tightening until snug, but not so tight as to crush the conduit.
Step 7 – Enjoy!
Now, all you need to do it to extend the arms, place the arm ends over the nylon nut that attaches #1b to each #2, and hang the tarp over #1b.
Then you just attach a bungee from the outer corners of the tarp hanging over #1b to the bottom of the legs and you’re ready to go! You may need different length bungees depending on the size you chose for your awning, so fit them to pull the tarp tightly over #1b.
To close it up, fold up the arms and legs and roll it all up. I then used the two bungees to hold the awning in a neat little bundle when we drove. You can see us undoing the bungee in the beginning of the video.
Did I miss something or is something unclear? Leave a comment and I’ll fix it up for you!