There are many reasons to get on this trail. Being on the west side of the continental divide, the greenery at the bottom of the valley may seem foreign to those east of the divide. Ferns, moss, and tropical flora seem to grow uninhibited in this sub-alpine wonderland. Mountains jut out of the ground and rise thousands of feet into the sky in true form of the Selkirks, nestling the diverse Asulkan Valley between abrupt, rugged and picturesque mountain ranges.
These wide and well-maintained trails are great for hikers of all skill levels. I’d even venture to say that a good chunk of the trail is even wheelchair accessible for the first few kilometers. As the trails break off and begin to gain altitude, they start to narrow into well-worn paths, with rocks and roots occasionally jutting out of the clay and sand.
If you were to continue to the Asulkan Hut, the trail remains open and unobstructed the entire way. But when you break away to head up the Sapphire Col, the trail completely disappears. To reach the Col, you’ll need some sharp route-finding skills, as well as knowledge of the ever-changing nature of glaciers. While straightforward, there are some gaping crevasses and seracs to navigate, so I caution anyone hoping to reach Sapphire Col via this route¹ to only do so with proper rescue training, the right equipment, and some experience navigating glaciers. It is also recommended to stop in at the Rogers Pass Discovery Centre to find out about current snow conditions.
Stats
| Trailhead Altitude: | 1,250 m (4,101 ft) | Trail Length: | 9.5 km |
| Hut Altitude: | 2,590 m (8,497 ft) | Difficulty: | Class 3 (Ropes, crampons, axes on glacier) |
| Net Altitude: | 1,340 m (4,396 ft) | Map: | 82N/3 (Mt Wheeler) |
| Time to Hut: | 5-8 hours to summit | Total Time: | 9-12 hours return |
Trailhead
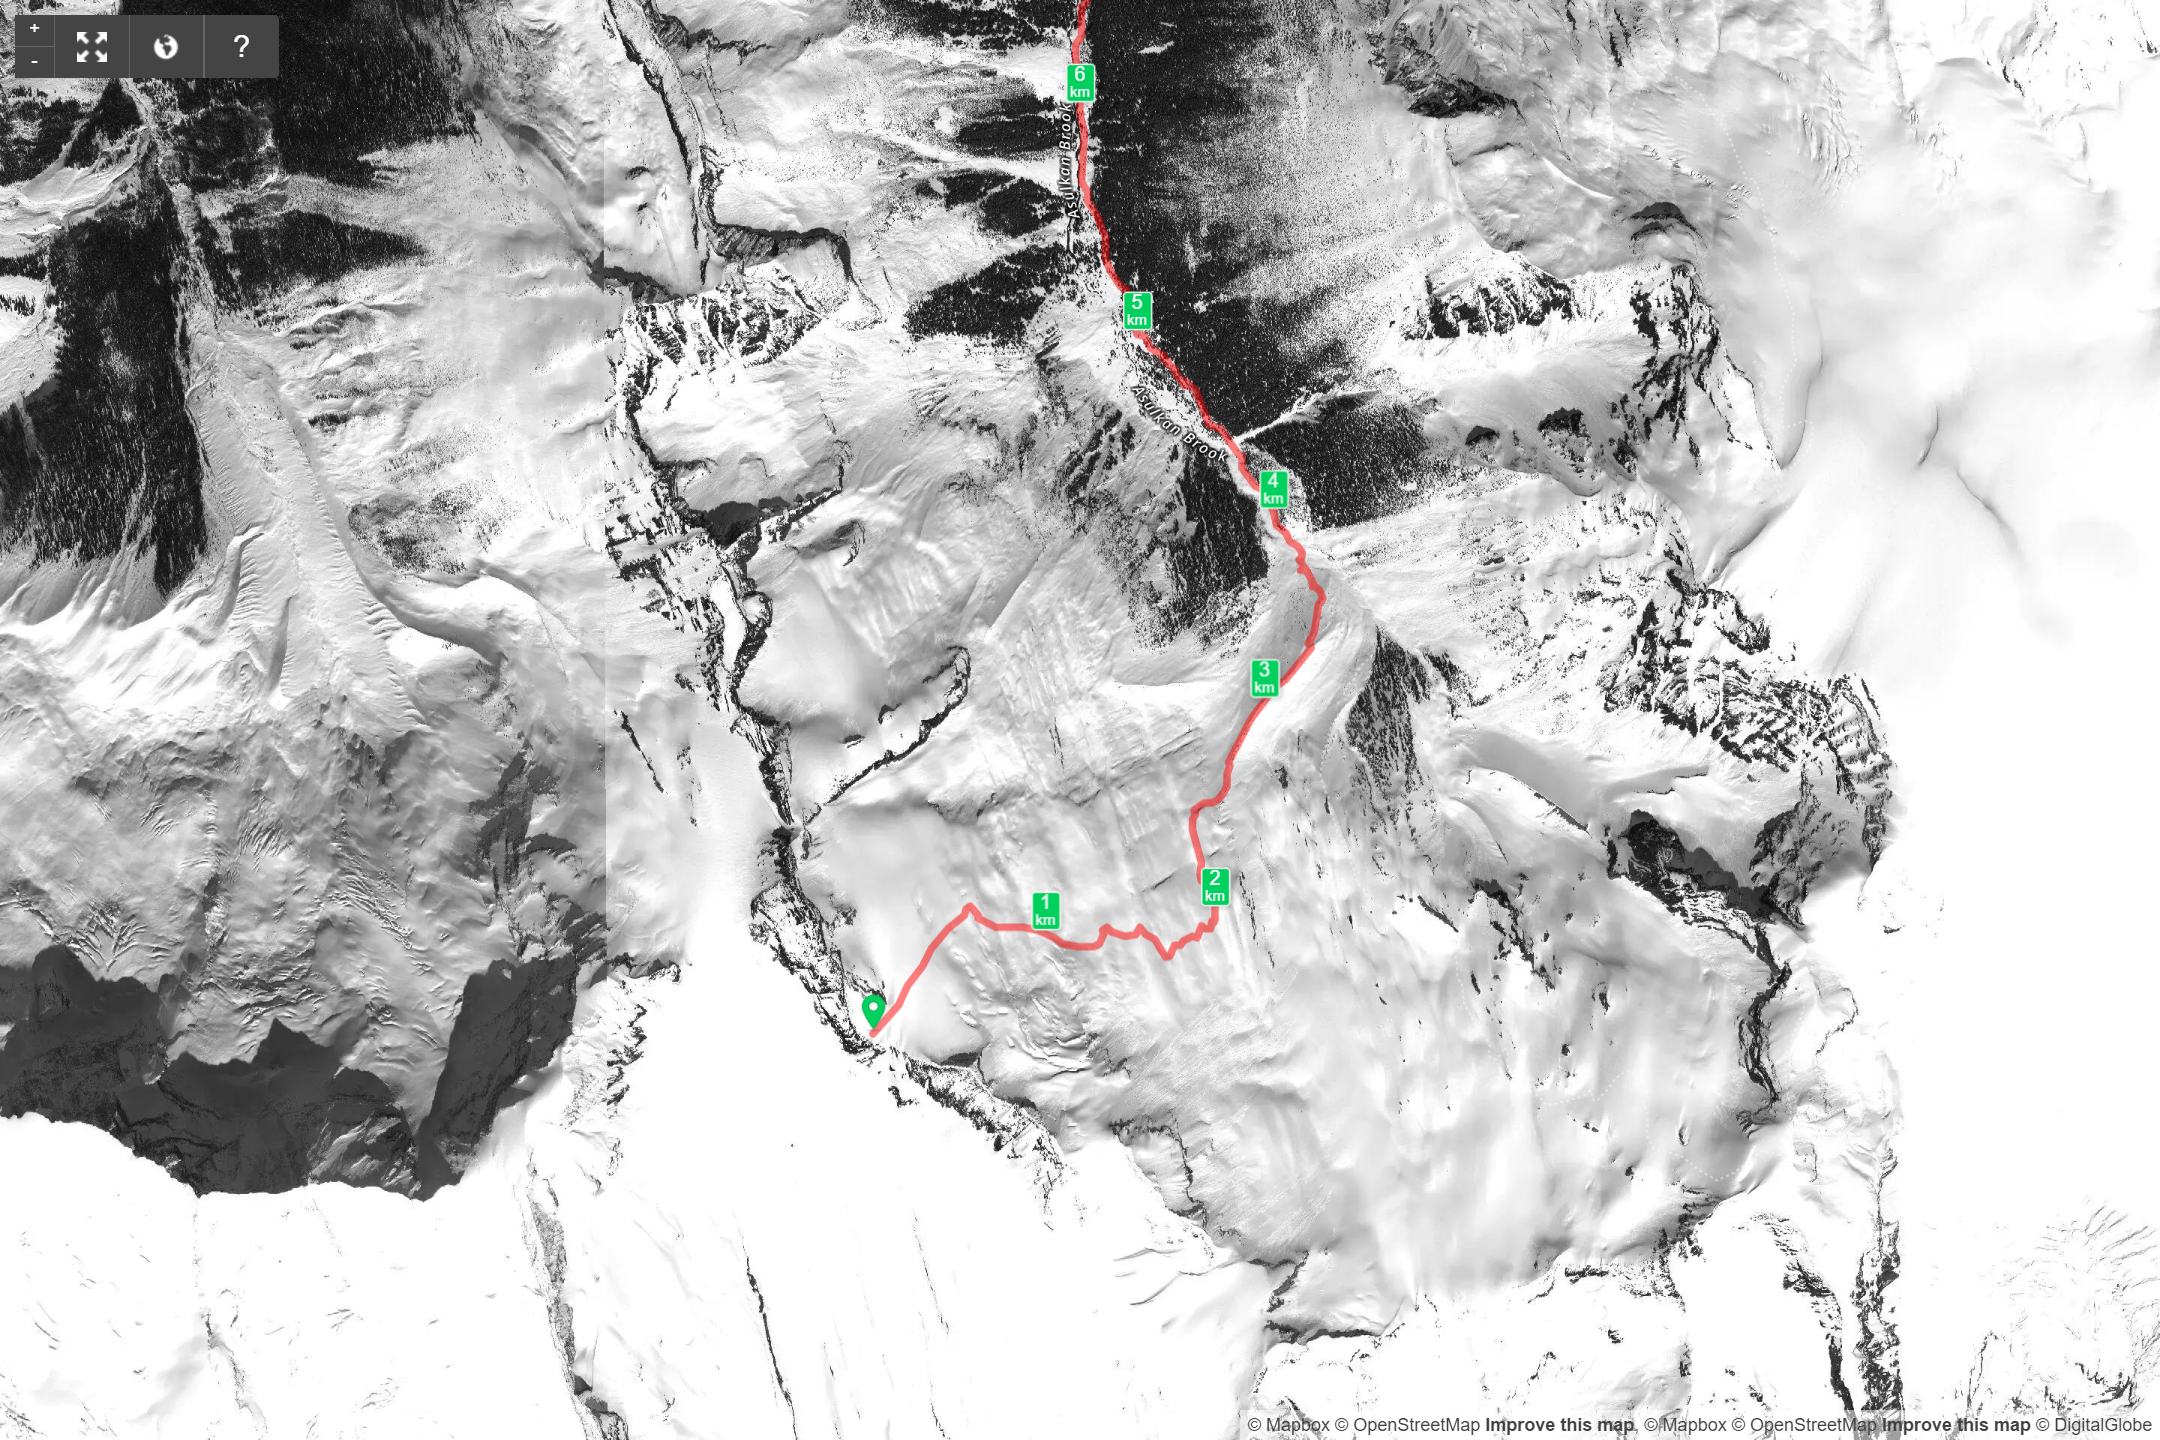
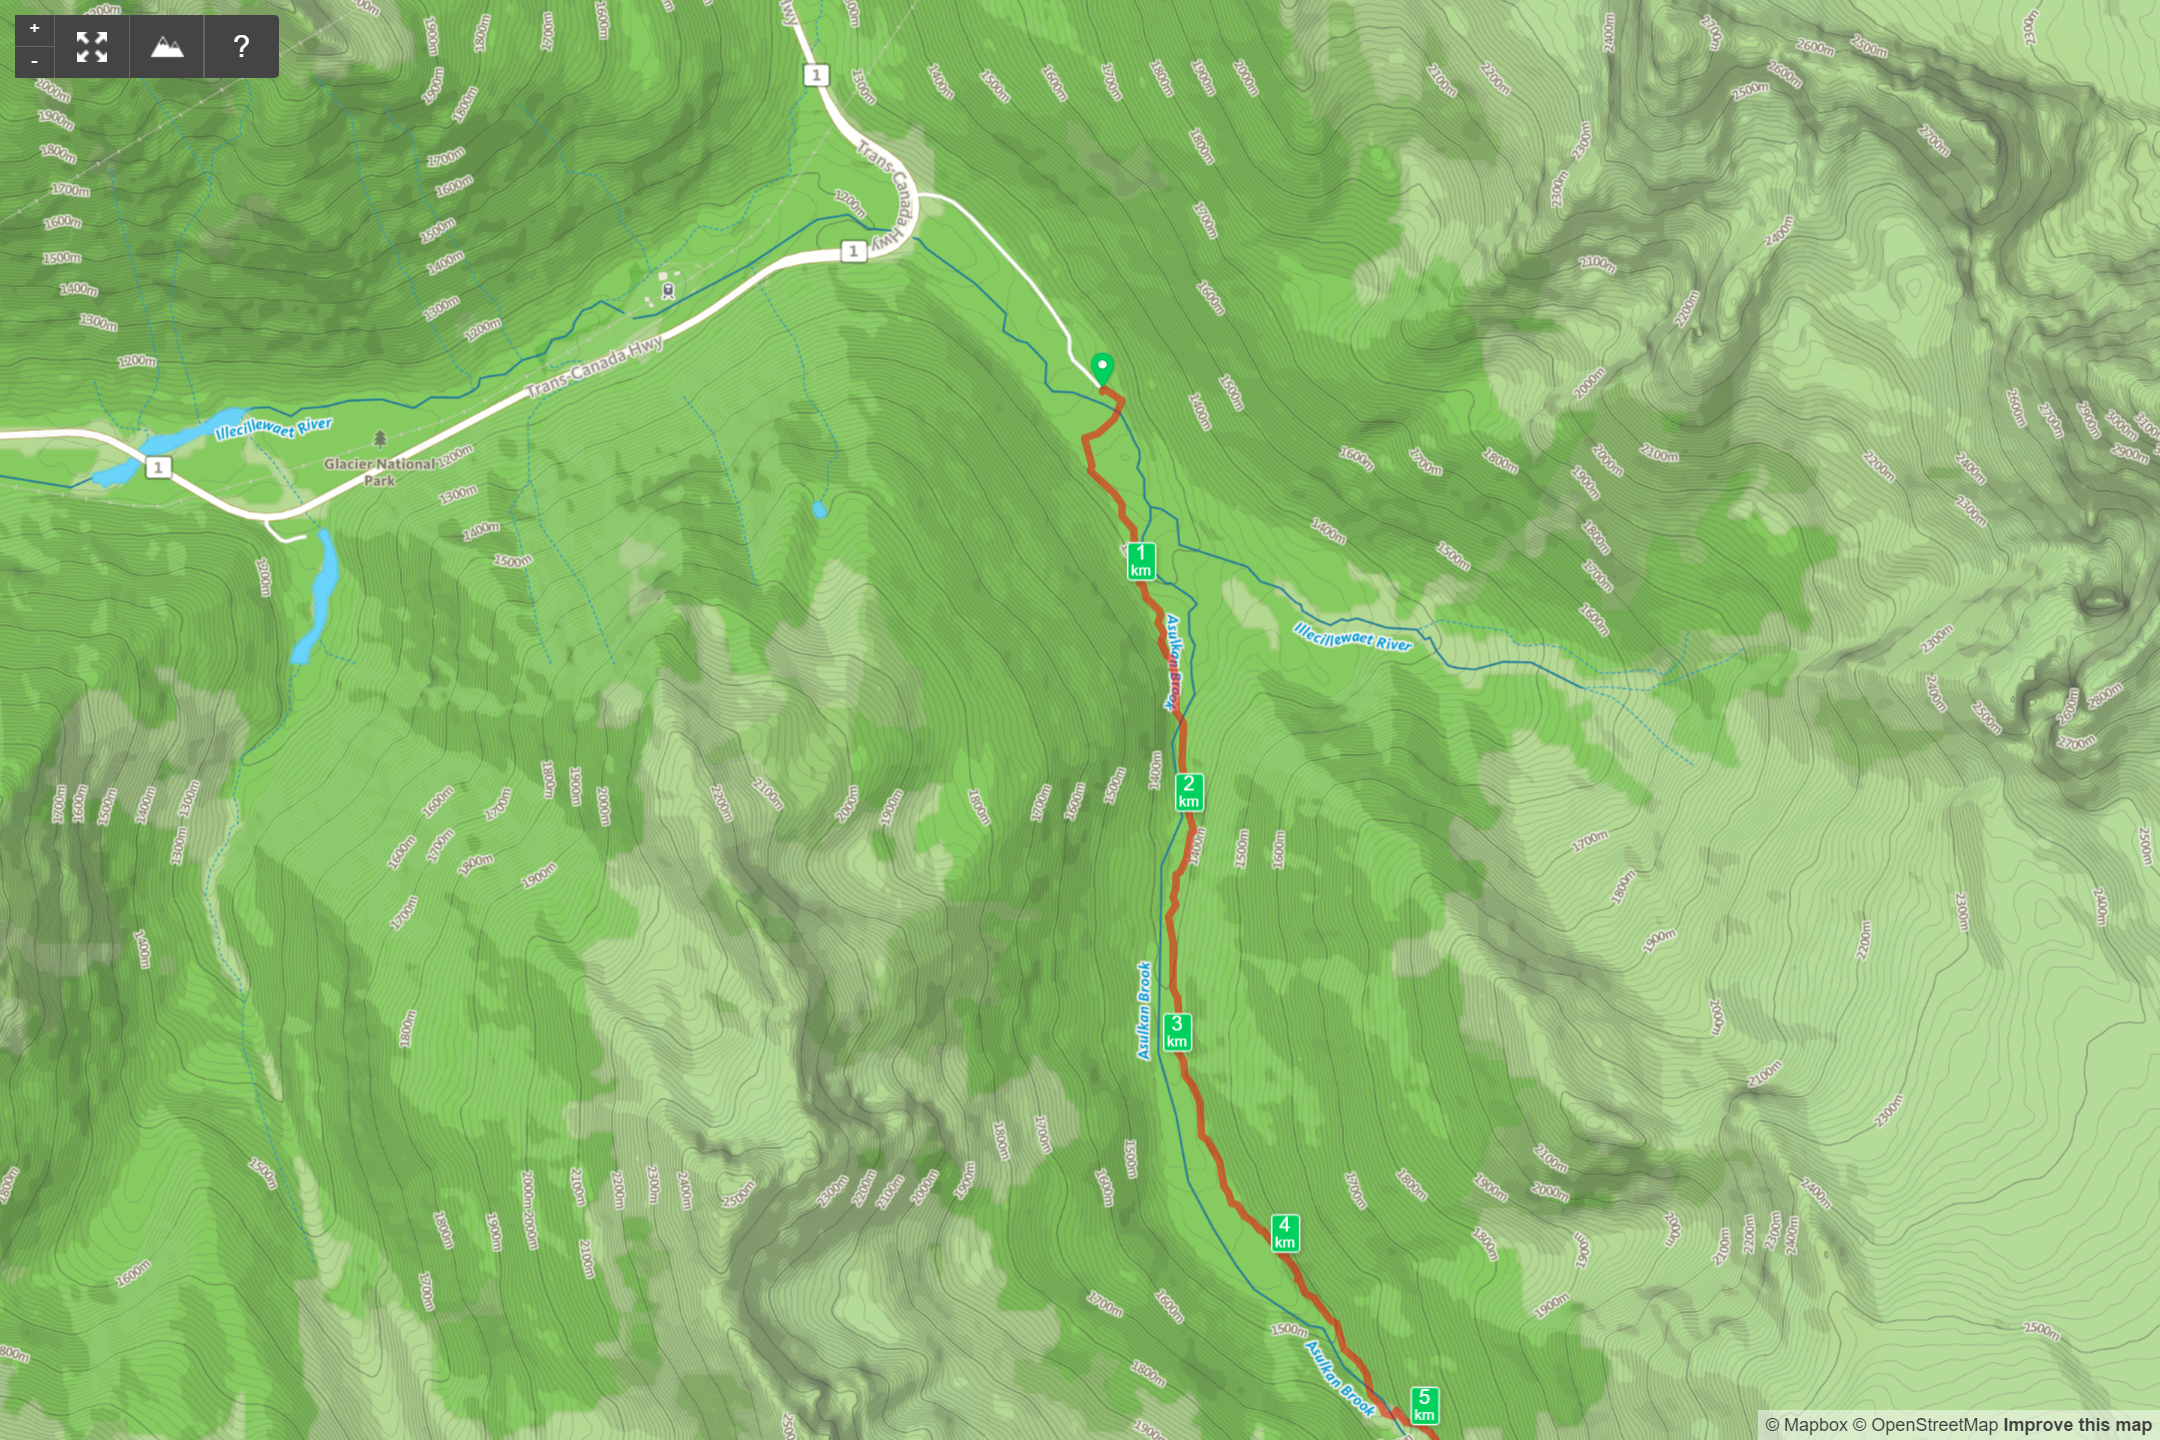
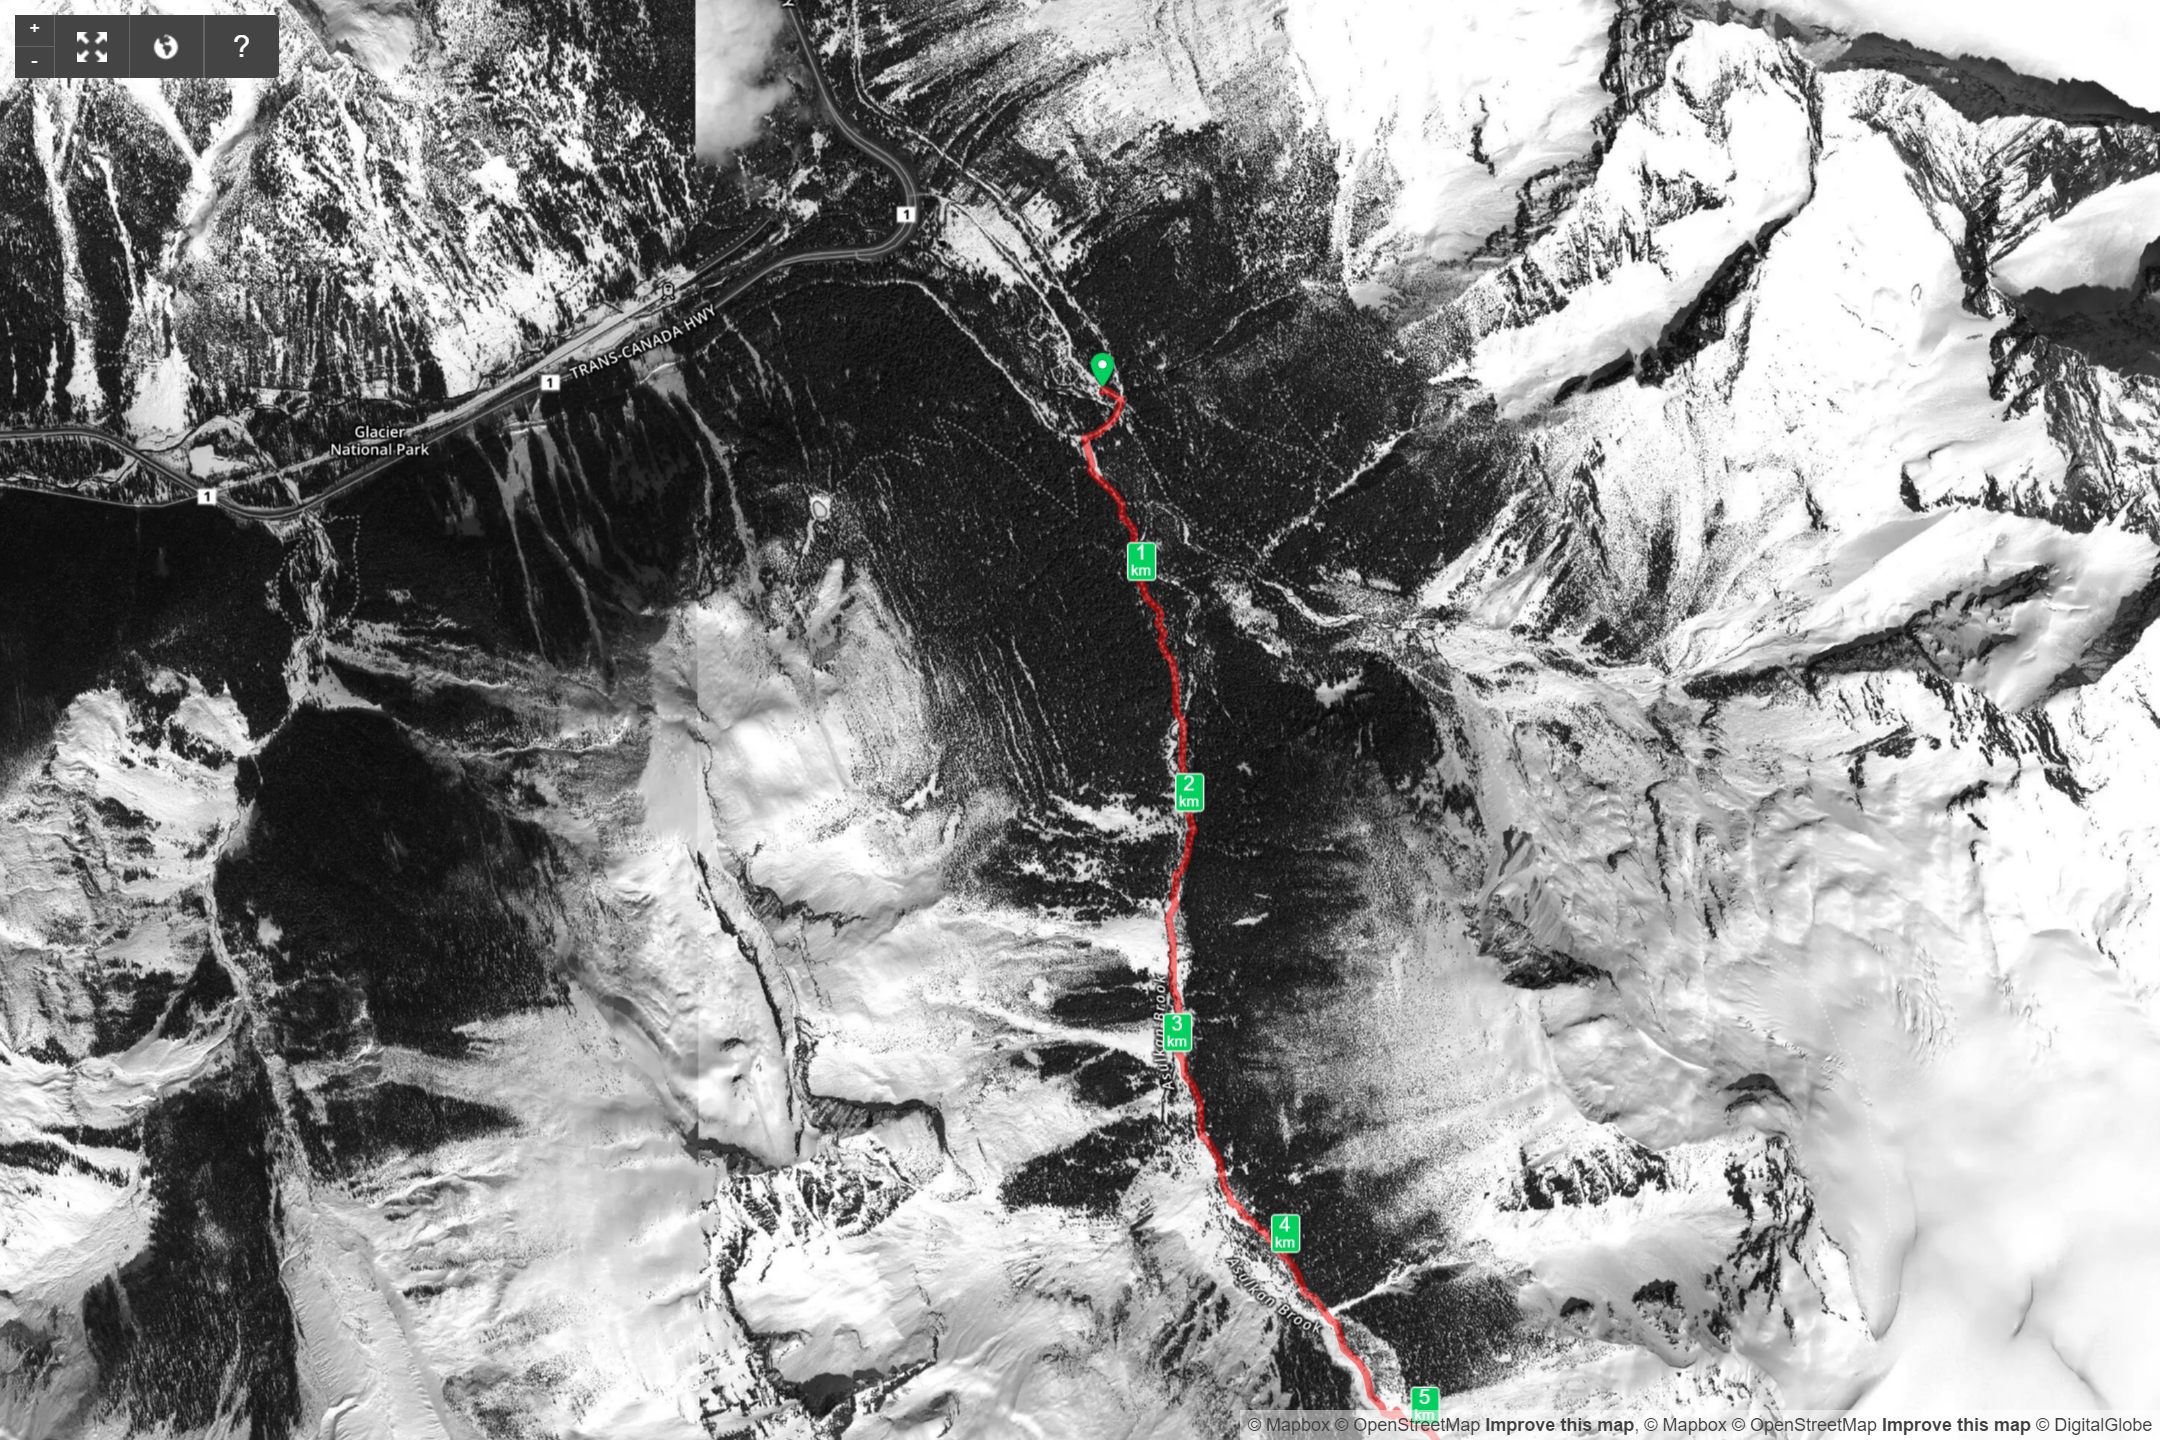
Pull into the Illecillewaet Campground, driving straight to the back, bypassing the campsites themselves. At the back, you will find a parking area used to reach the A. O. Wheeler Hut and hiking trails (full by 8 am on ideal days). Heading southeast, follow the old railroad access road up, away from the parking area. Once you reach the old rail alignment, follow it to the right for 150 m. Turning left into an obvious opening in the trees, you’ll pass the remnants of Glacier House as the trail rises slowly into the forest.
The Trail
The trail up to Asulkan Hut is very well defined and maintained. It essentially follows the Illecillewaet river up into the Asulkan Valley. The trail is wide and well marked with signs at each junction.
Once past the Glacier House remains, you can pretty much just keep right at every junction. You’ll find yourself within earshot of the river the entire way while following the signs to the Asulkan Valley. Other than a few short ups and downs, you’ll come out of the trees alongside the river. After a short run through a brook-side meadow and small talus field, the trail bears specifically to the left as it enters the “mouse trap”.
Option A: Lower River Crossing
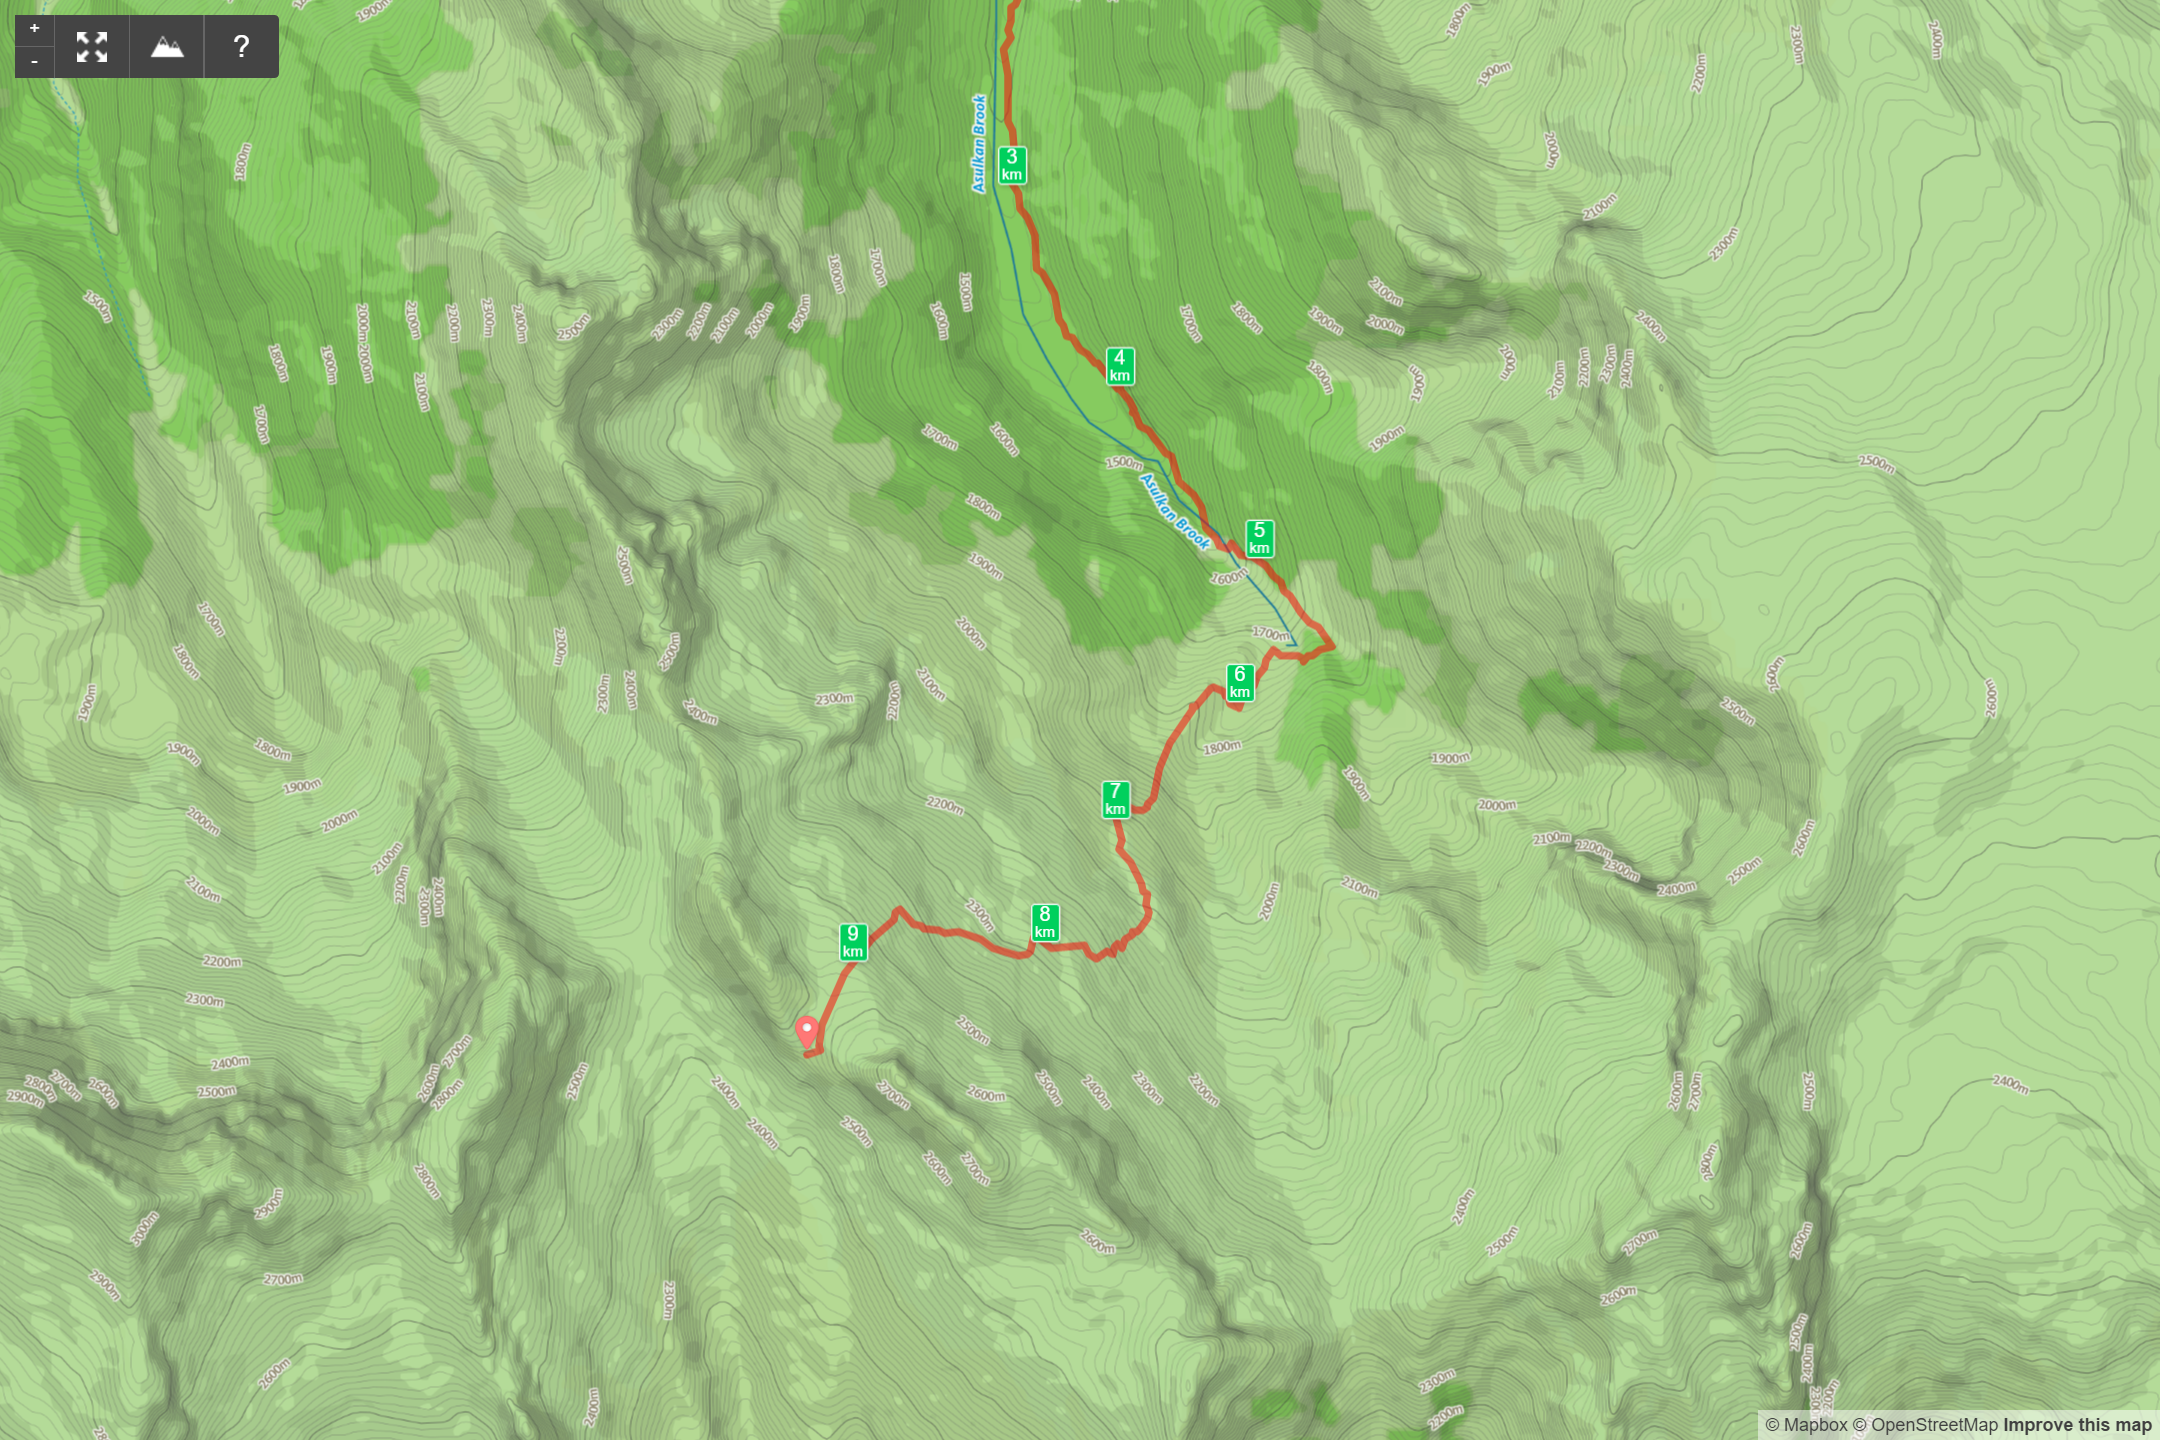
As you round the corner, the Asulkan Valley begins to open up in front of you. You will come to a point where the river will be a few meters below you to your right. This is your first option to break away toward Sapphire Col and it has its advantages and disadvantages. You will see an obvious lateral moraine in front of you that rises just from the other side of the river – the top of that moraine is your target. Don’t get this confused with the lateral moraine that leads up to the Asulkan Hut which at this point is still mostly out of view.
The good: it is a little shorter. The bad: there is some bushwhacking to be done to gain the moraine. Proximity to the river creates a habitat for many different kinds of bushes, including the kinds that are a pain in the rear to navigate. Also, depending on the water flow, the river may be impassible here. When I went last, the river was uncomfortable to cross in either location so this one is a bit of a choose your own adventure.
If you chose this path, cross the river and gain the top of the moraine as you see fit.
Option B: Upper River Crossing
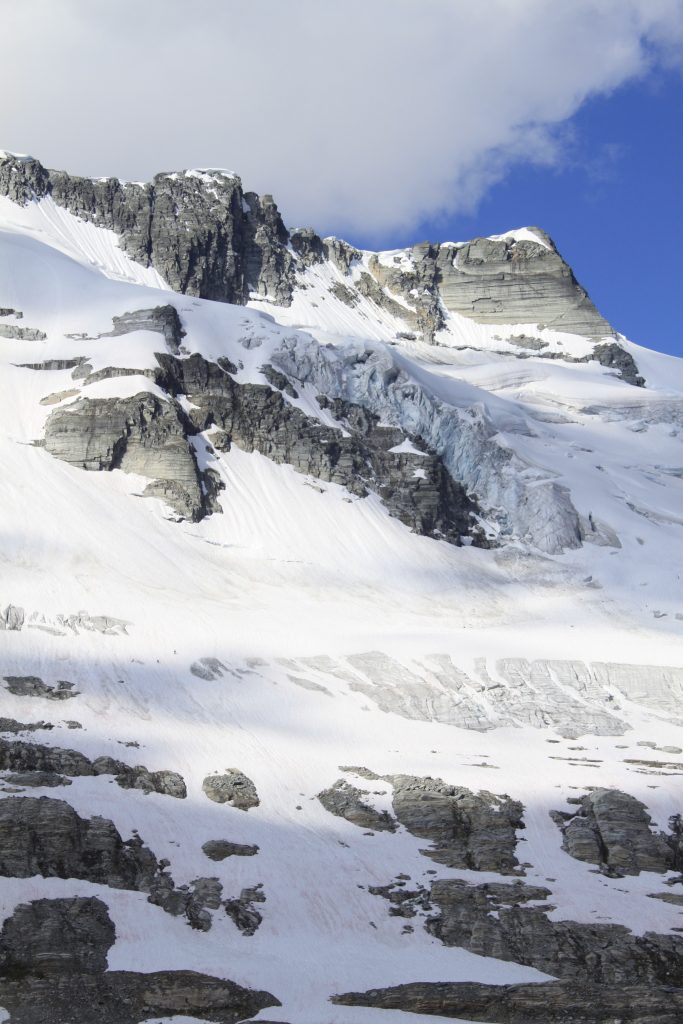
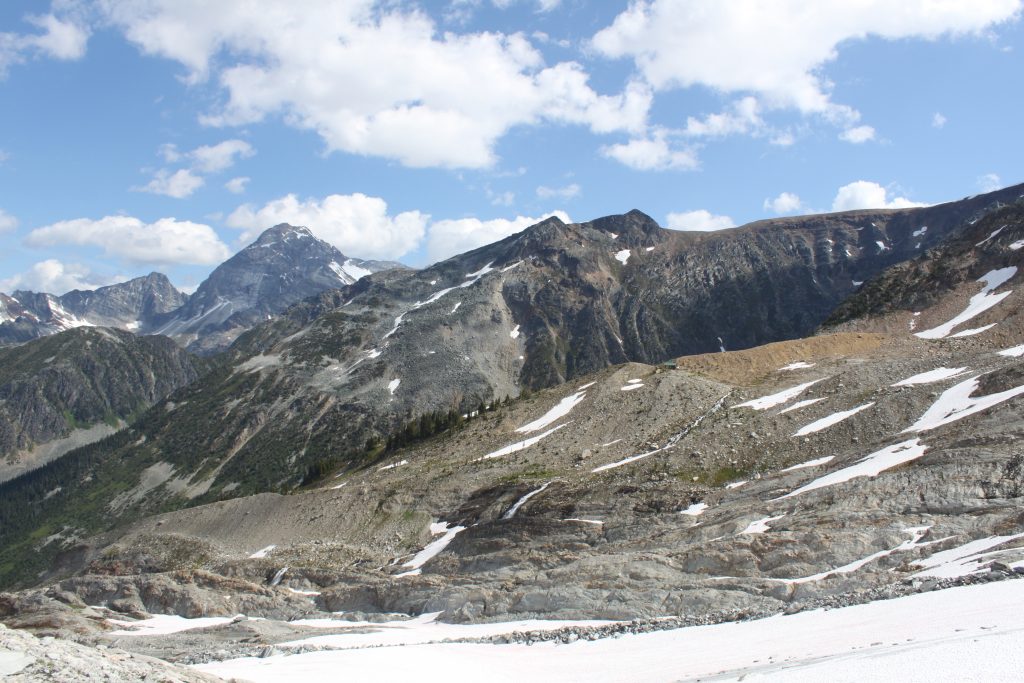
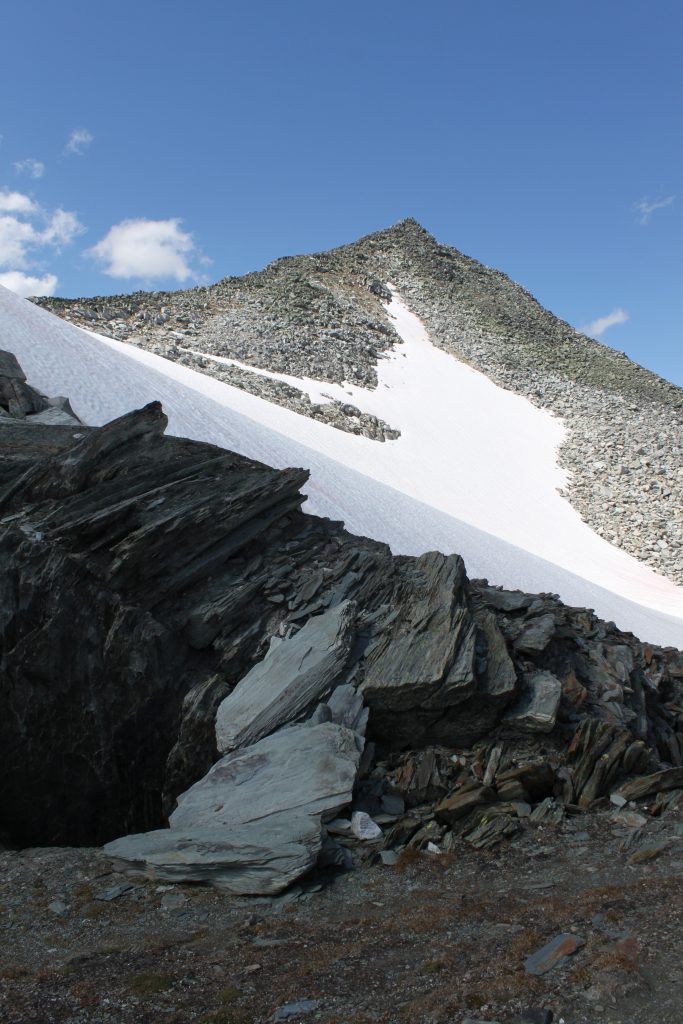
Continue along the trail toward Asulkan Hut. As you gain elevation, note the left and right lateral moraines – you now will be heading to the left moraine, but only for a short distance before crossing to the right moraine. Continuing alongside the brook, you will come to a bridge. Follow the trail as it turns right, through the trees. As you come out of the trees and gain the left moraine, find a suitable place to leave the trail, aiming for the lower end of the right moraine. Season dependent, find a suitable place to cross the river. It braids in spots, so you might have to do some hunting to find a good spot. Once across, save yourself some grief and scramble right to gain the moraine, then follow the moraine uphill until you reach rolling rock slabs that have been polished by the retreating glacier. Continuing the same direction as the moraine, follow the slabs to their highest point and scramble to your right, directly up the rocky slope to the foot of the glacier.
The Glacier¹
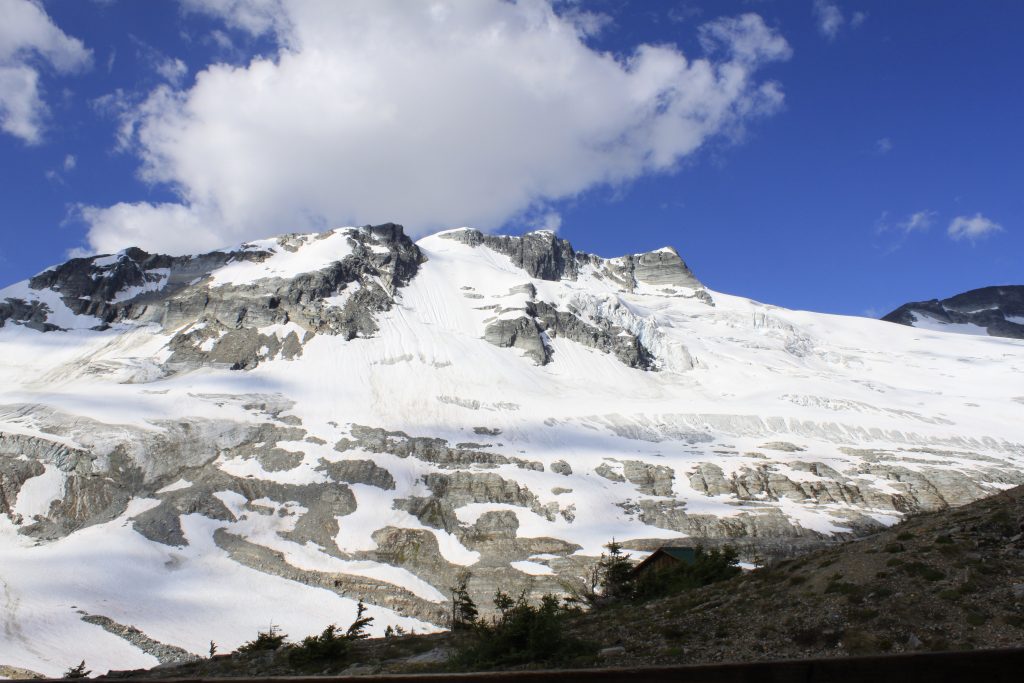
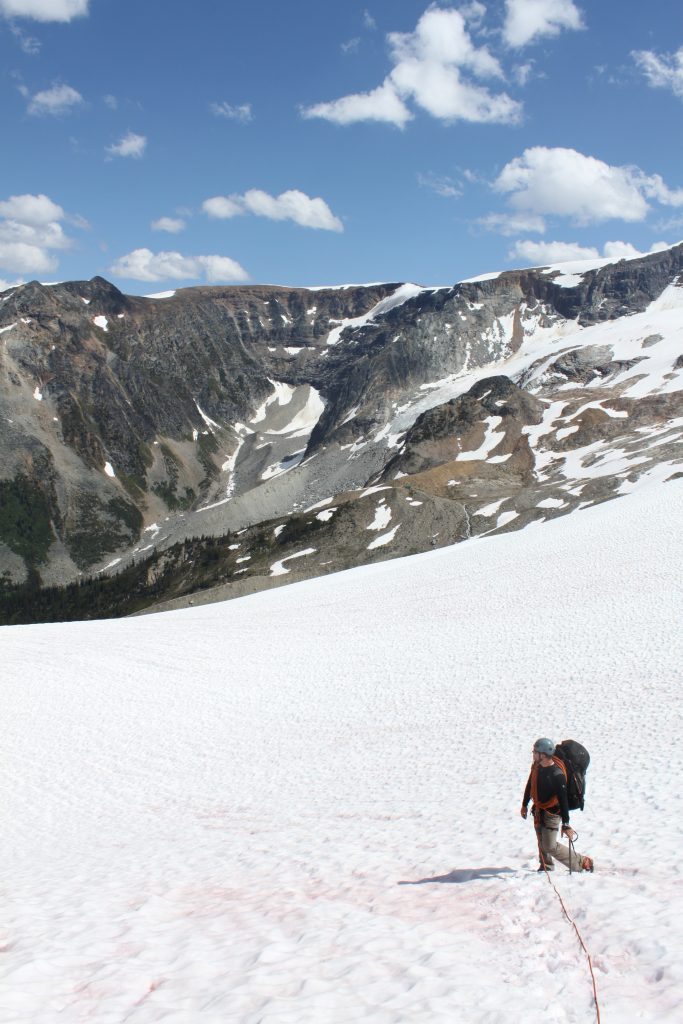
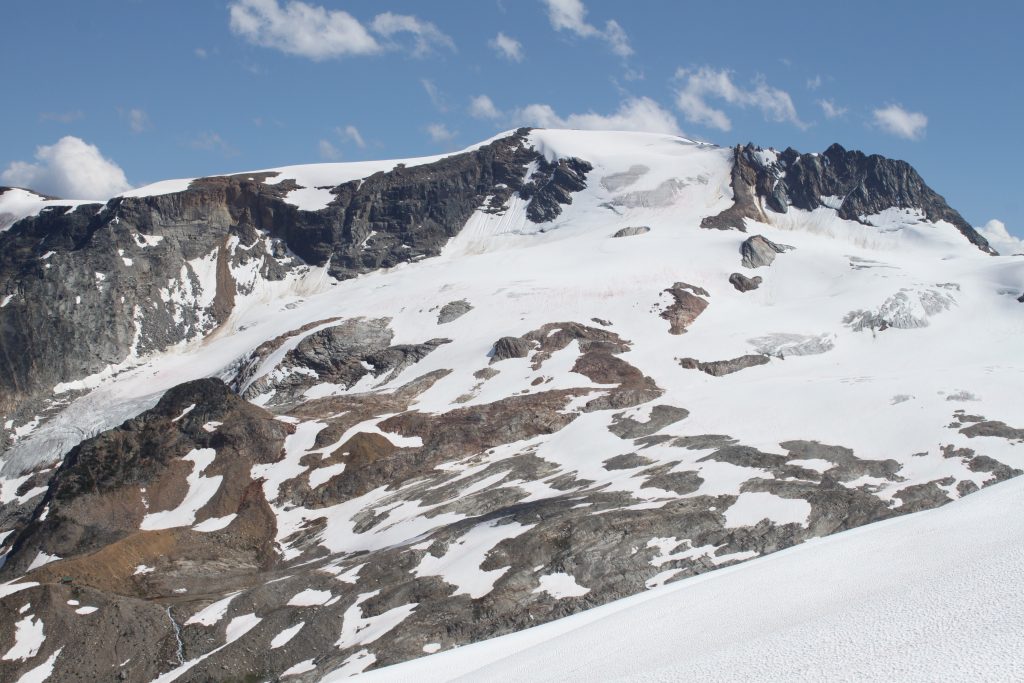
Don your ropes and crampons, and head up and over the rounded toe. Snow cover can vary significantly, so be watchful for changing crevasse exposure. As you level out on the glacier, note the summits of Castor Peak and The Dome. Your goal is between those two landmarks.
There is no way to give adequate directions to cross the glacier, as it changes by the day. We were lucky to have great snow accumulation the previous winter, so every snow bridge we encountered was sound, and were able to take a near-direct line, only deviating to the right to gain a more predictable mound that leads to the hut. In whiteout conditions, this will be a daunting task. There are a few handrails one could use to reach the hut, but the one I would recommend is to the right, along the base of the dome as the glacier settles in a trough and should be less likely to leave gaping crevasses (and is also part of another route I’m planning to test).
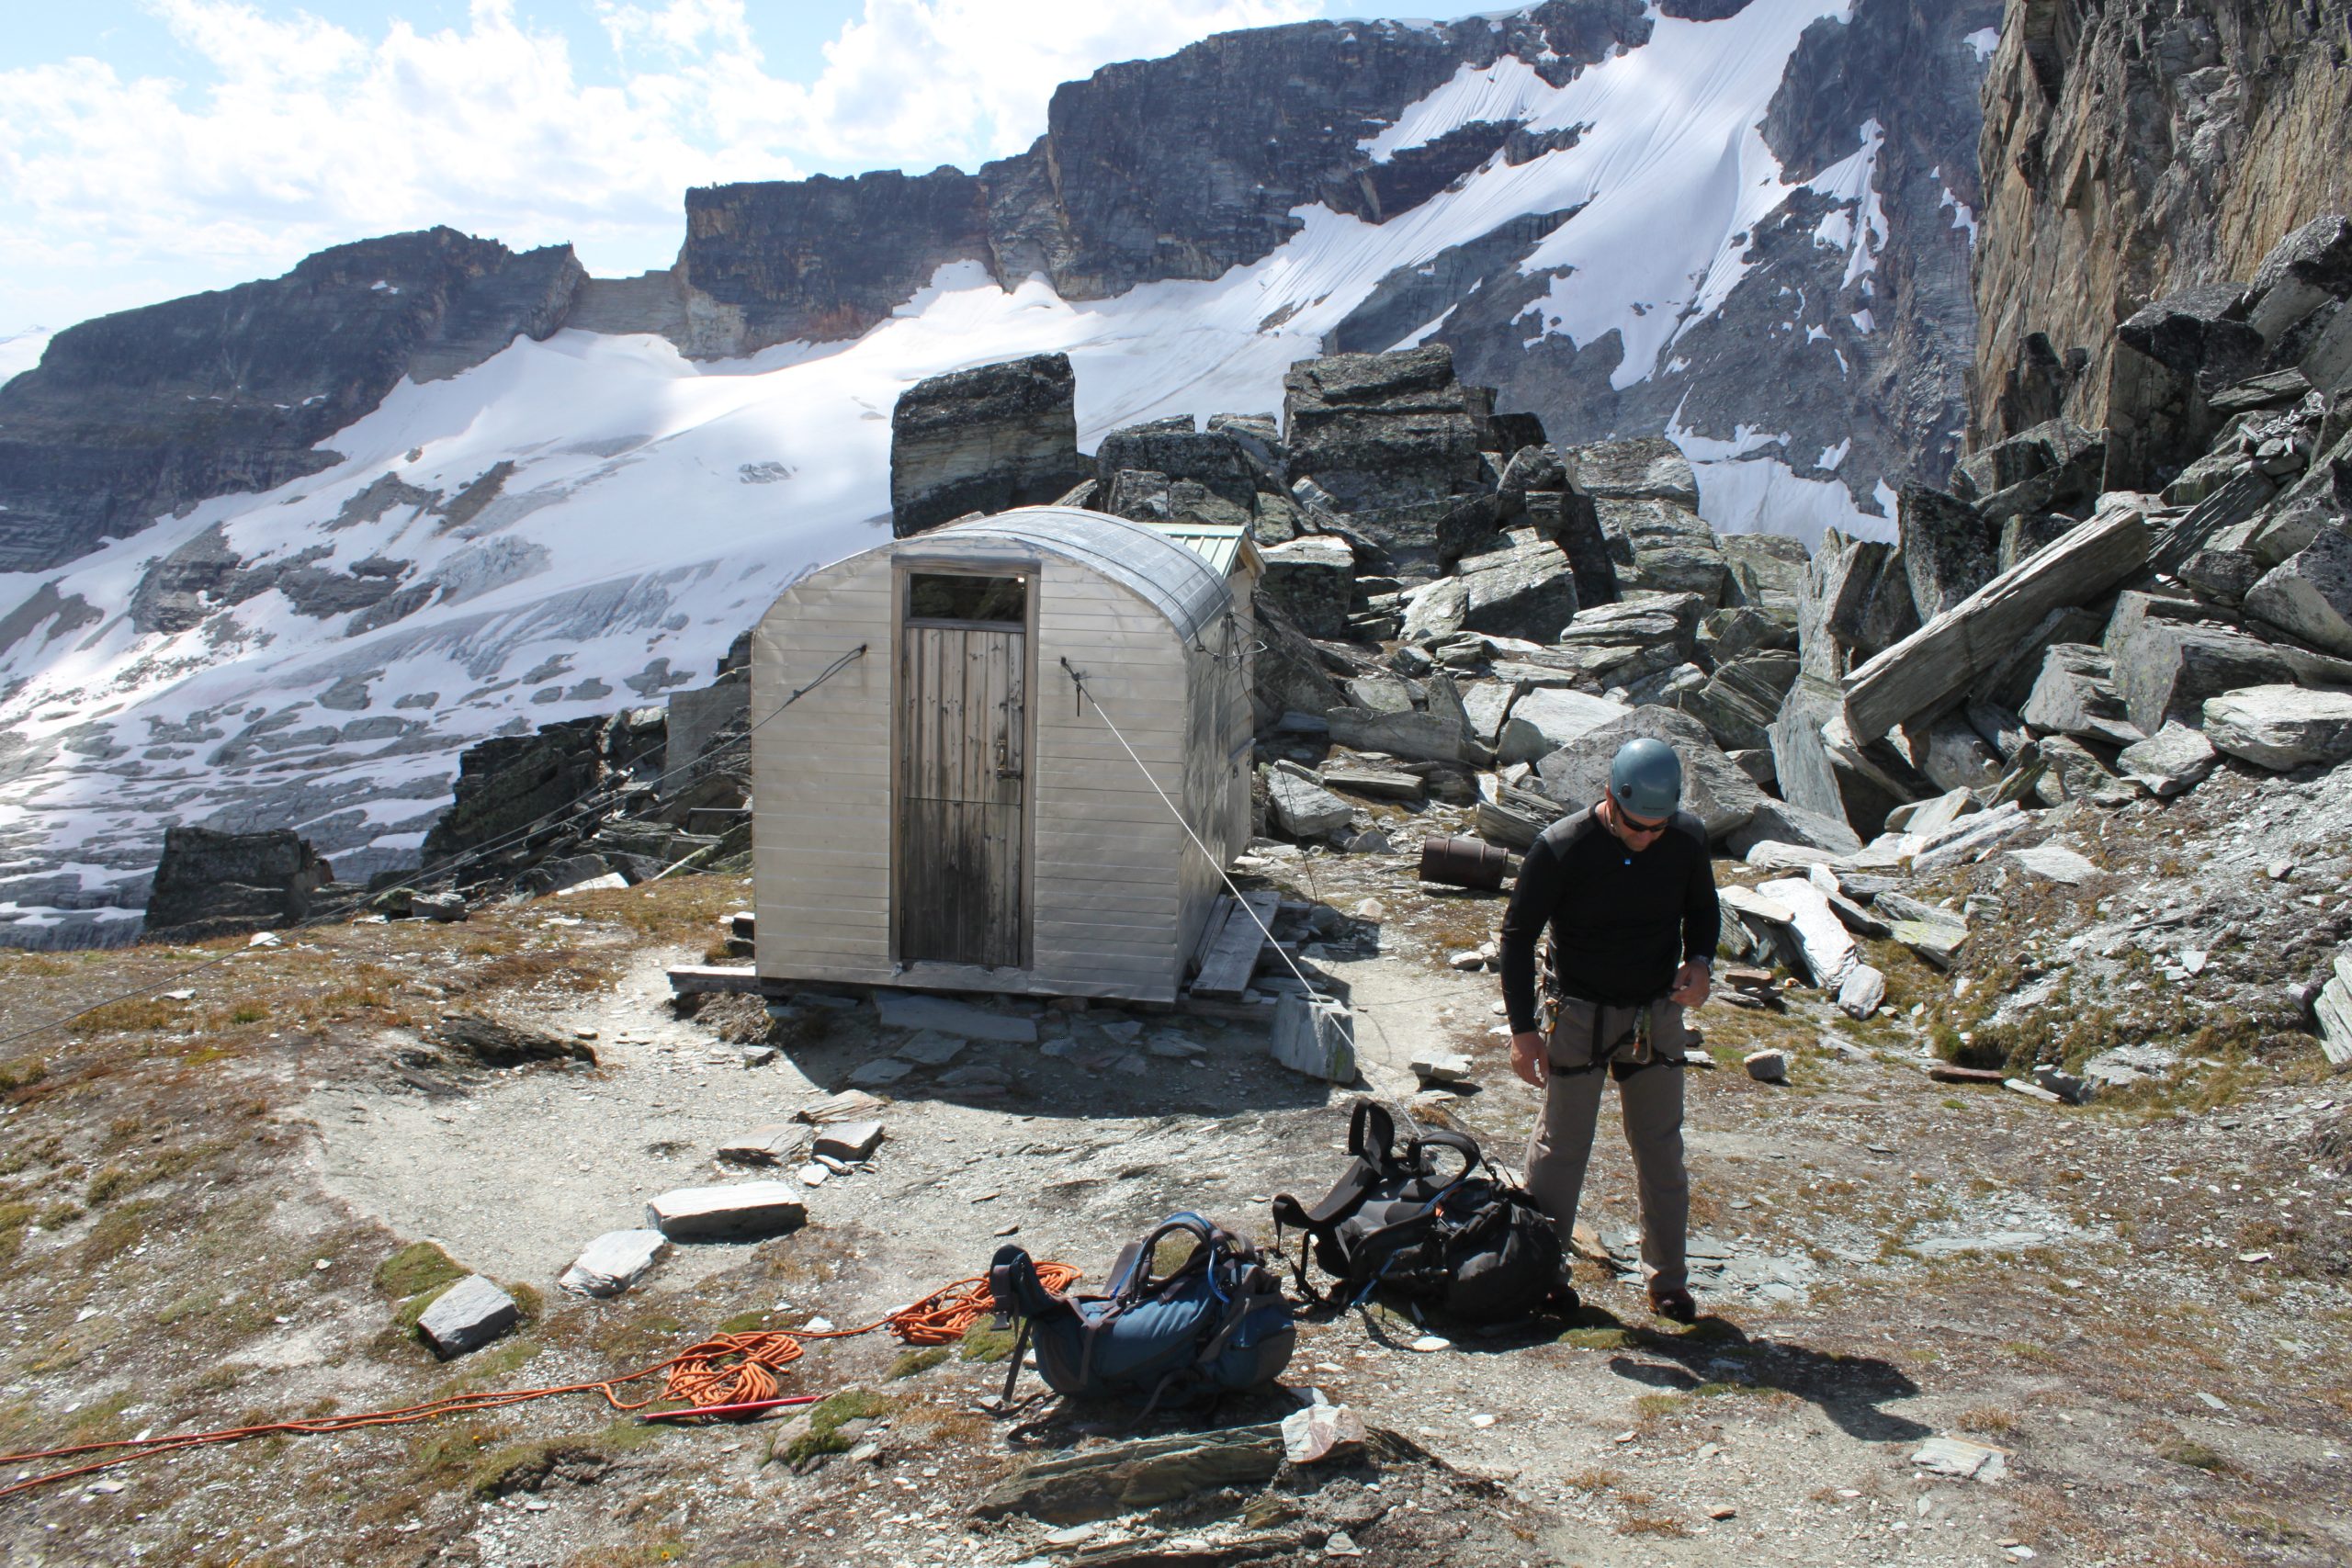
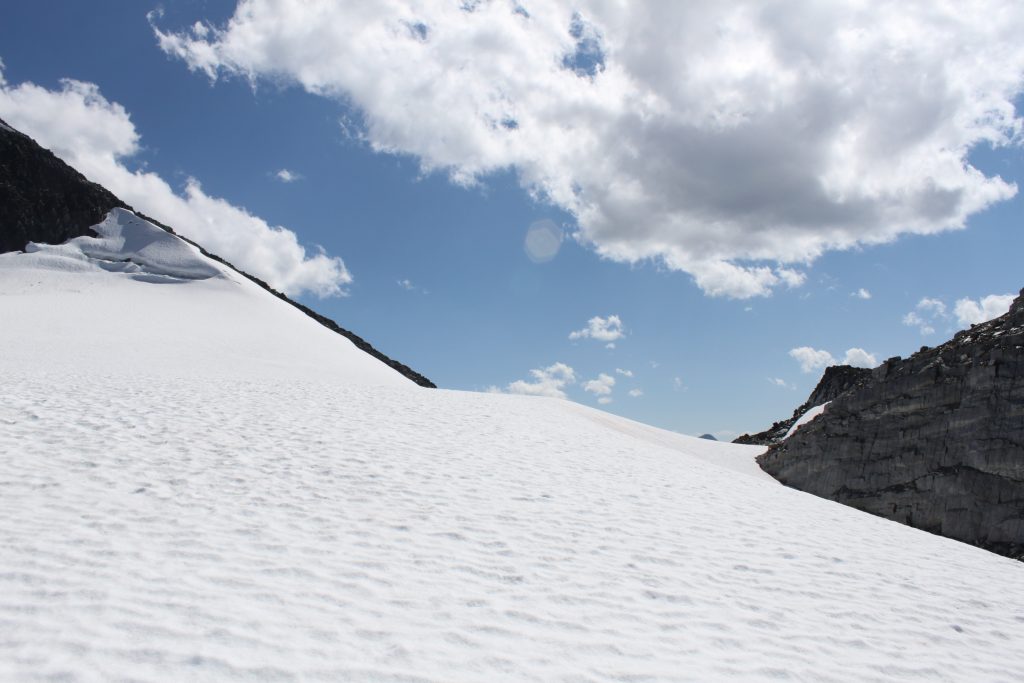
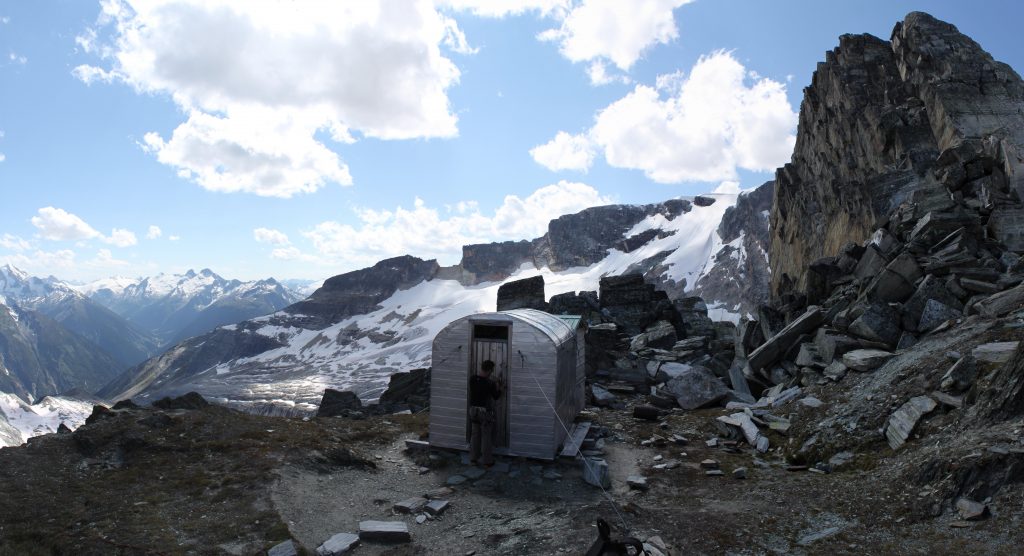
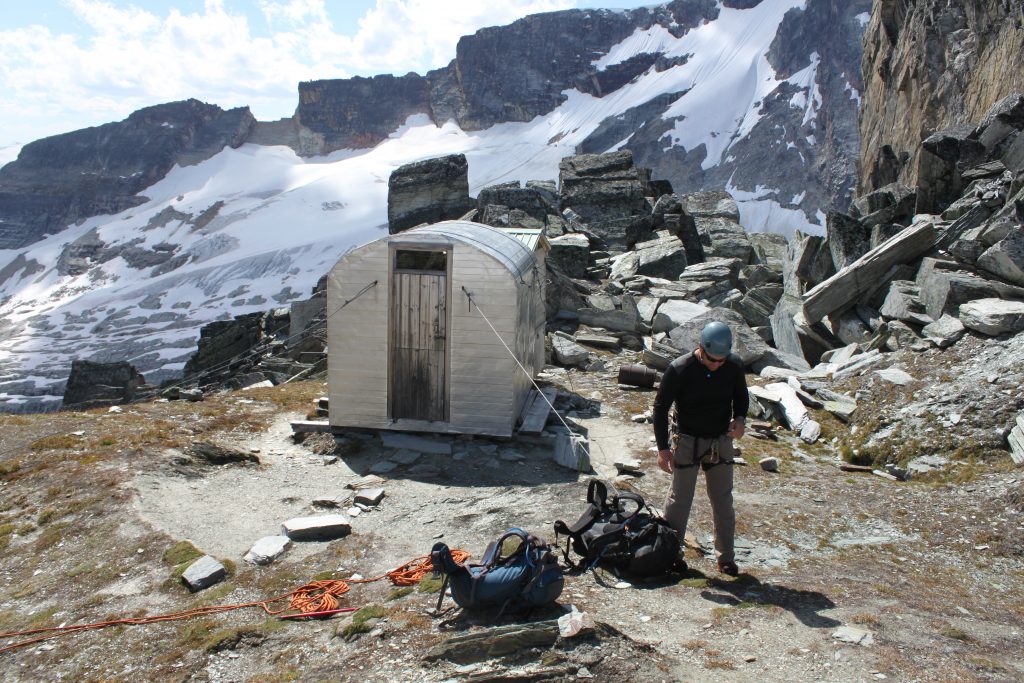
Once you’ve reached a unified mound, the hut is only a short distance away. Continue toward the Sapphire Col until you see the shiny metal box that will be your home for the night.
Sapphire Col from Asulkan Cabin
If you happen to be making a stop at Asulkan hut on your way in or out, you have a pretty straightforward approach. Both directions afford you a good visual of your route (weather permitting).
From Asulkan Cabin, head toward Asulkan Pass. Contour around as you find comfortable to a point that gains the glacier under Mount Jupiter. With Jupiter to your left, continue up obvious ledges on the glacier, gaining elevation as the crevasses allow. When you find yourself between Asulkan cabin and the Sapphire Col, find a suitable route directly toward the col. If crevasses are between you and your destination, keep to the right until you gain an obvious glacial mound. Don’t worry, you can’t go too far without hitting the bergschrund under The Dome. If you venture that far, handrail off The Dome to your left (up the glacier) until you reach the pass.
What to do once you arrive
There are a number of objectives from Sapphire Col.
- Traversing the Abbot Range to the north over The Dome, The Rampart, Mount Afton, Mount Abbot to reach the Lookout, creating the option to exit by descending past Marion Lake to the trailhead.
- Traversing to the southeast Jupiter Range via Castor Peak, Mount Jupiter, and Leda Peak to the Asulkan Pass. The Asulkan Cabin isn’t much more than an hour or two from the pass or exit 5-6 hours to the trailhead.
- Exiting northwest to the Lily Glacier (which is more of a winter objective).
Where to stay
The A. O. Wheeler Hut is the most convenient place to stay in the area, but its ease of access (stones throw from summer parking) can make it a bit of a zoo, and hard to book on popular dates. The Asulkan Cabin is also easily accessible, with a 4-6 hour hike. Wheeler, Asulkan, and Sapphire huts must all be booked through the Alpine Club of Canada‘s website or by calling their Canmore Office.
The nearest camping is the adjacent Illecillewaet Campground. Refer to Parks Canada’s rules if you are considering the possibility of an overnight bivi in the backcountry. There are no designated campgrounds once you are in the alpine, and camping may be restricted because of the delicate Grizzly bear habitat throughout the Parks.
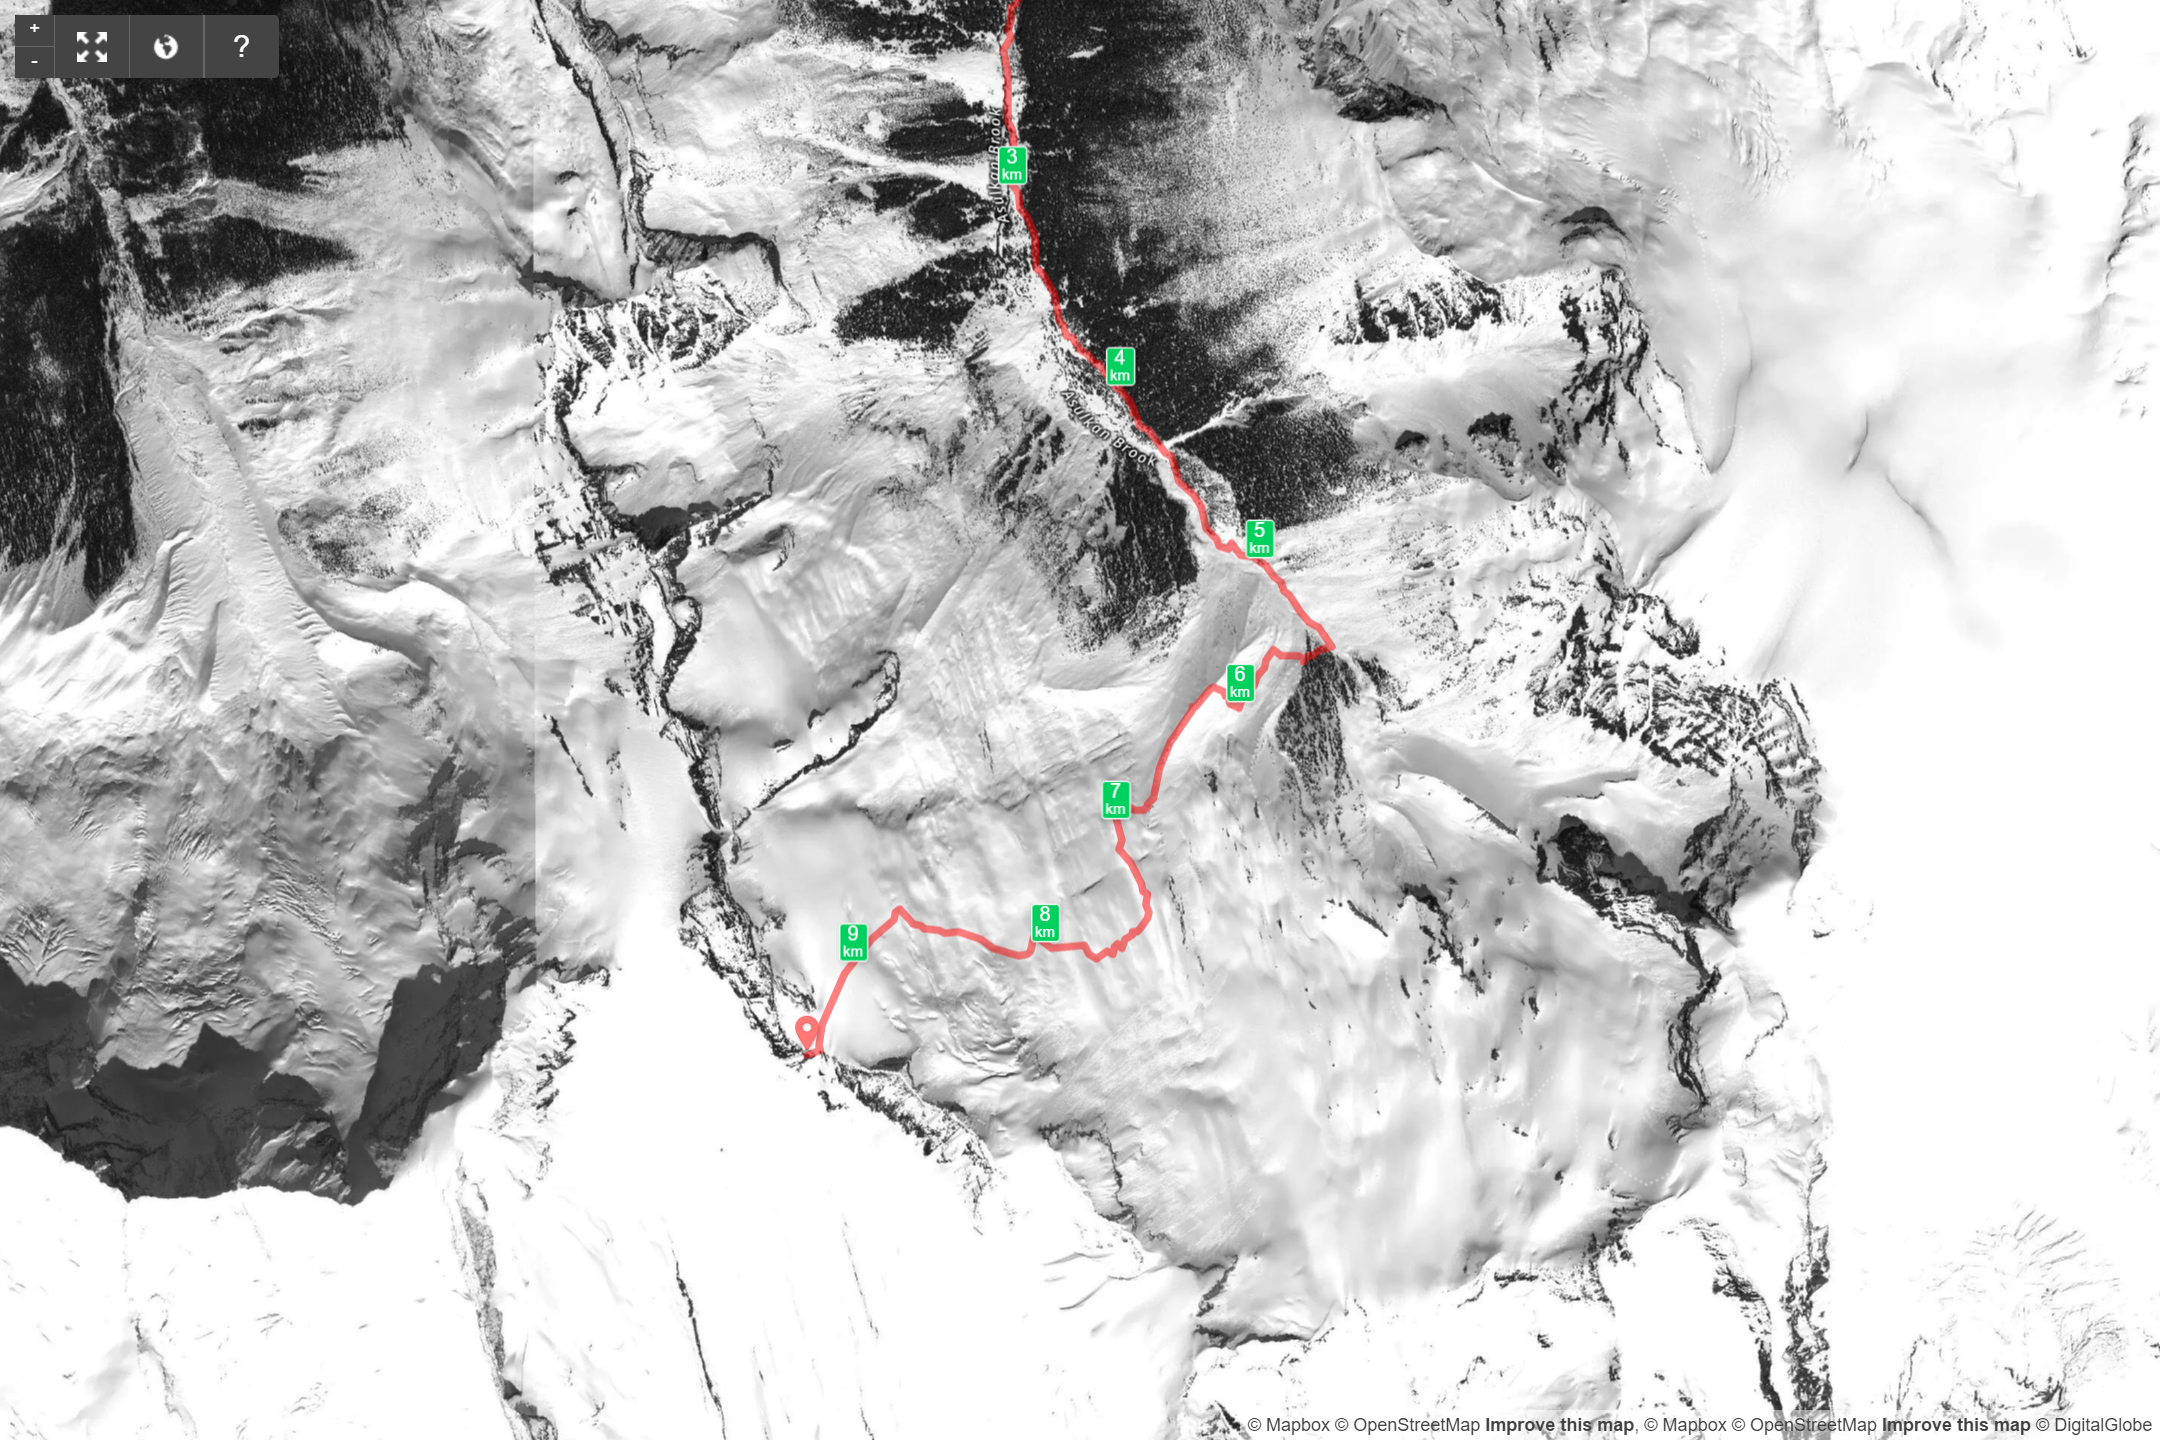
Routes
Download the Lower River and Upper River Crossing route to Sapphire Col – GPX
Lower River Crossing Route
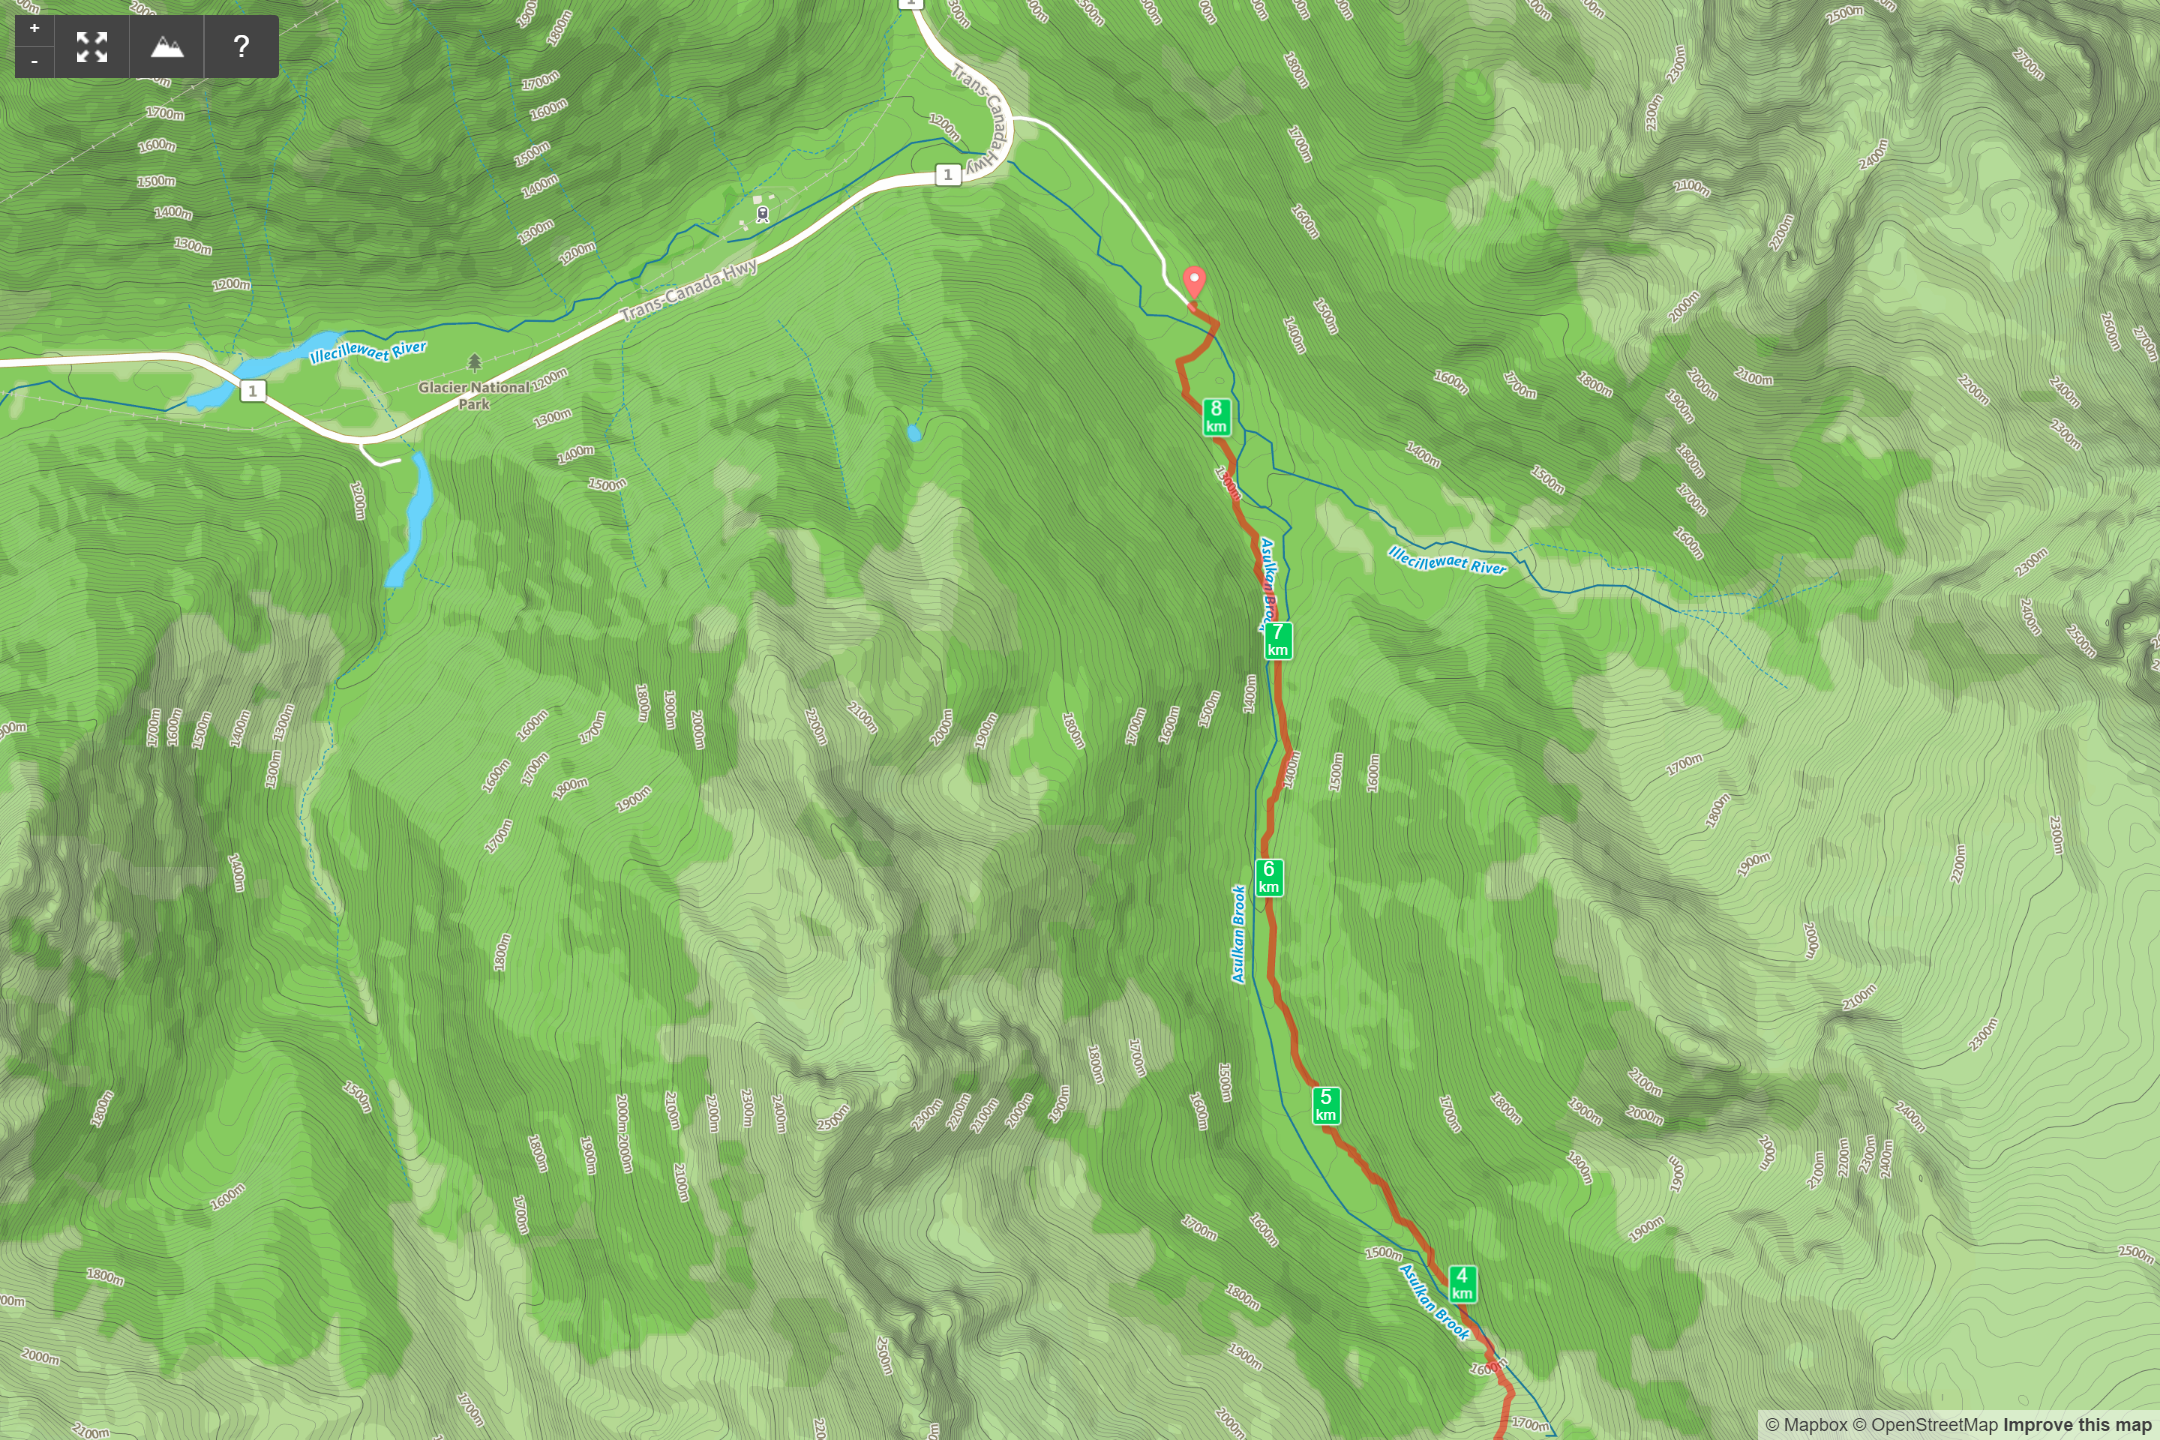
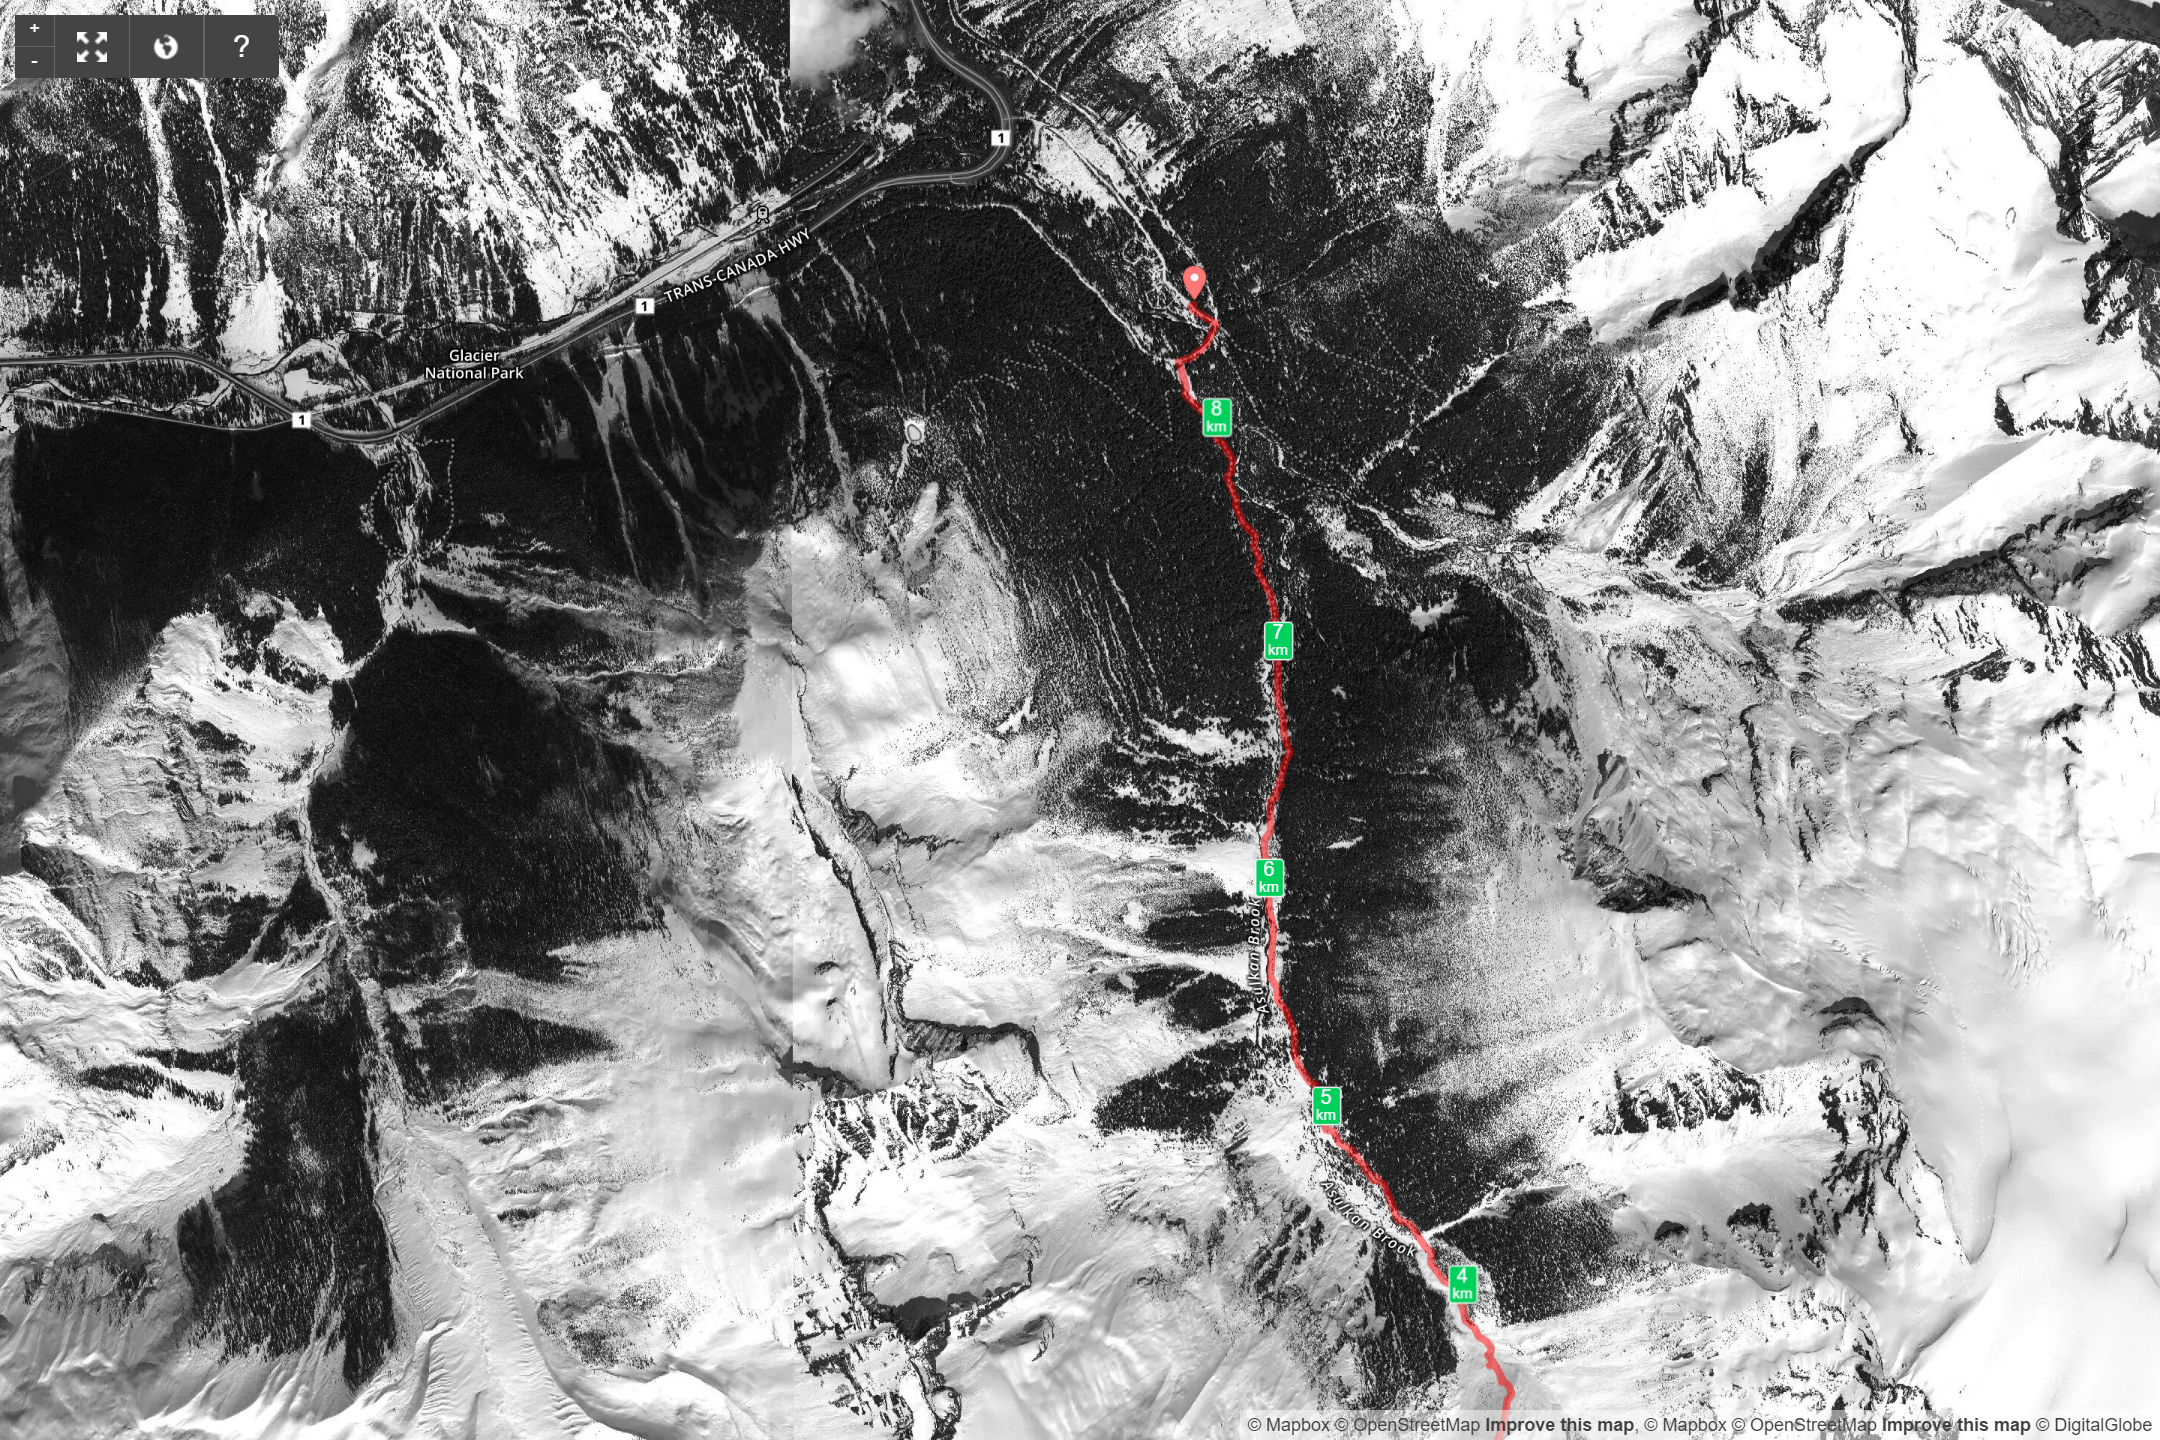
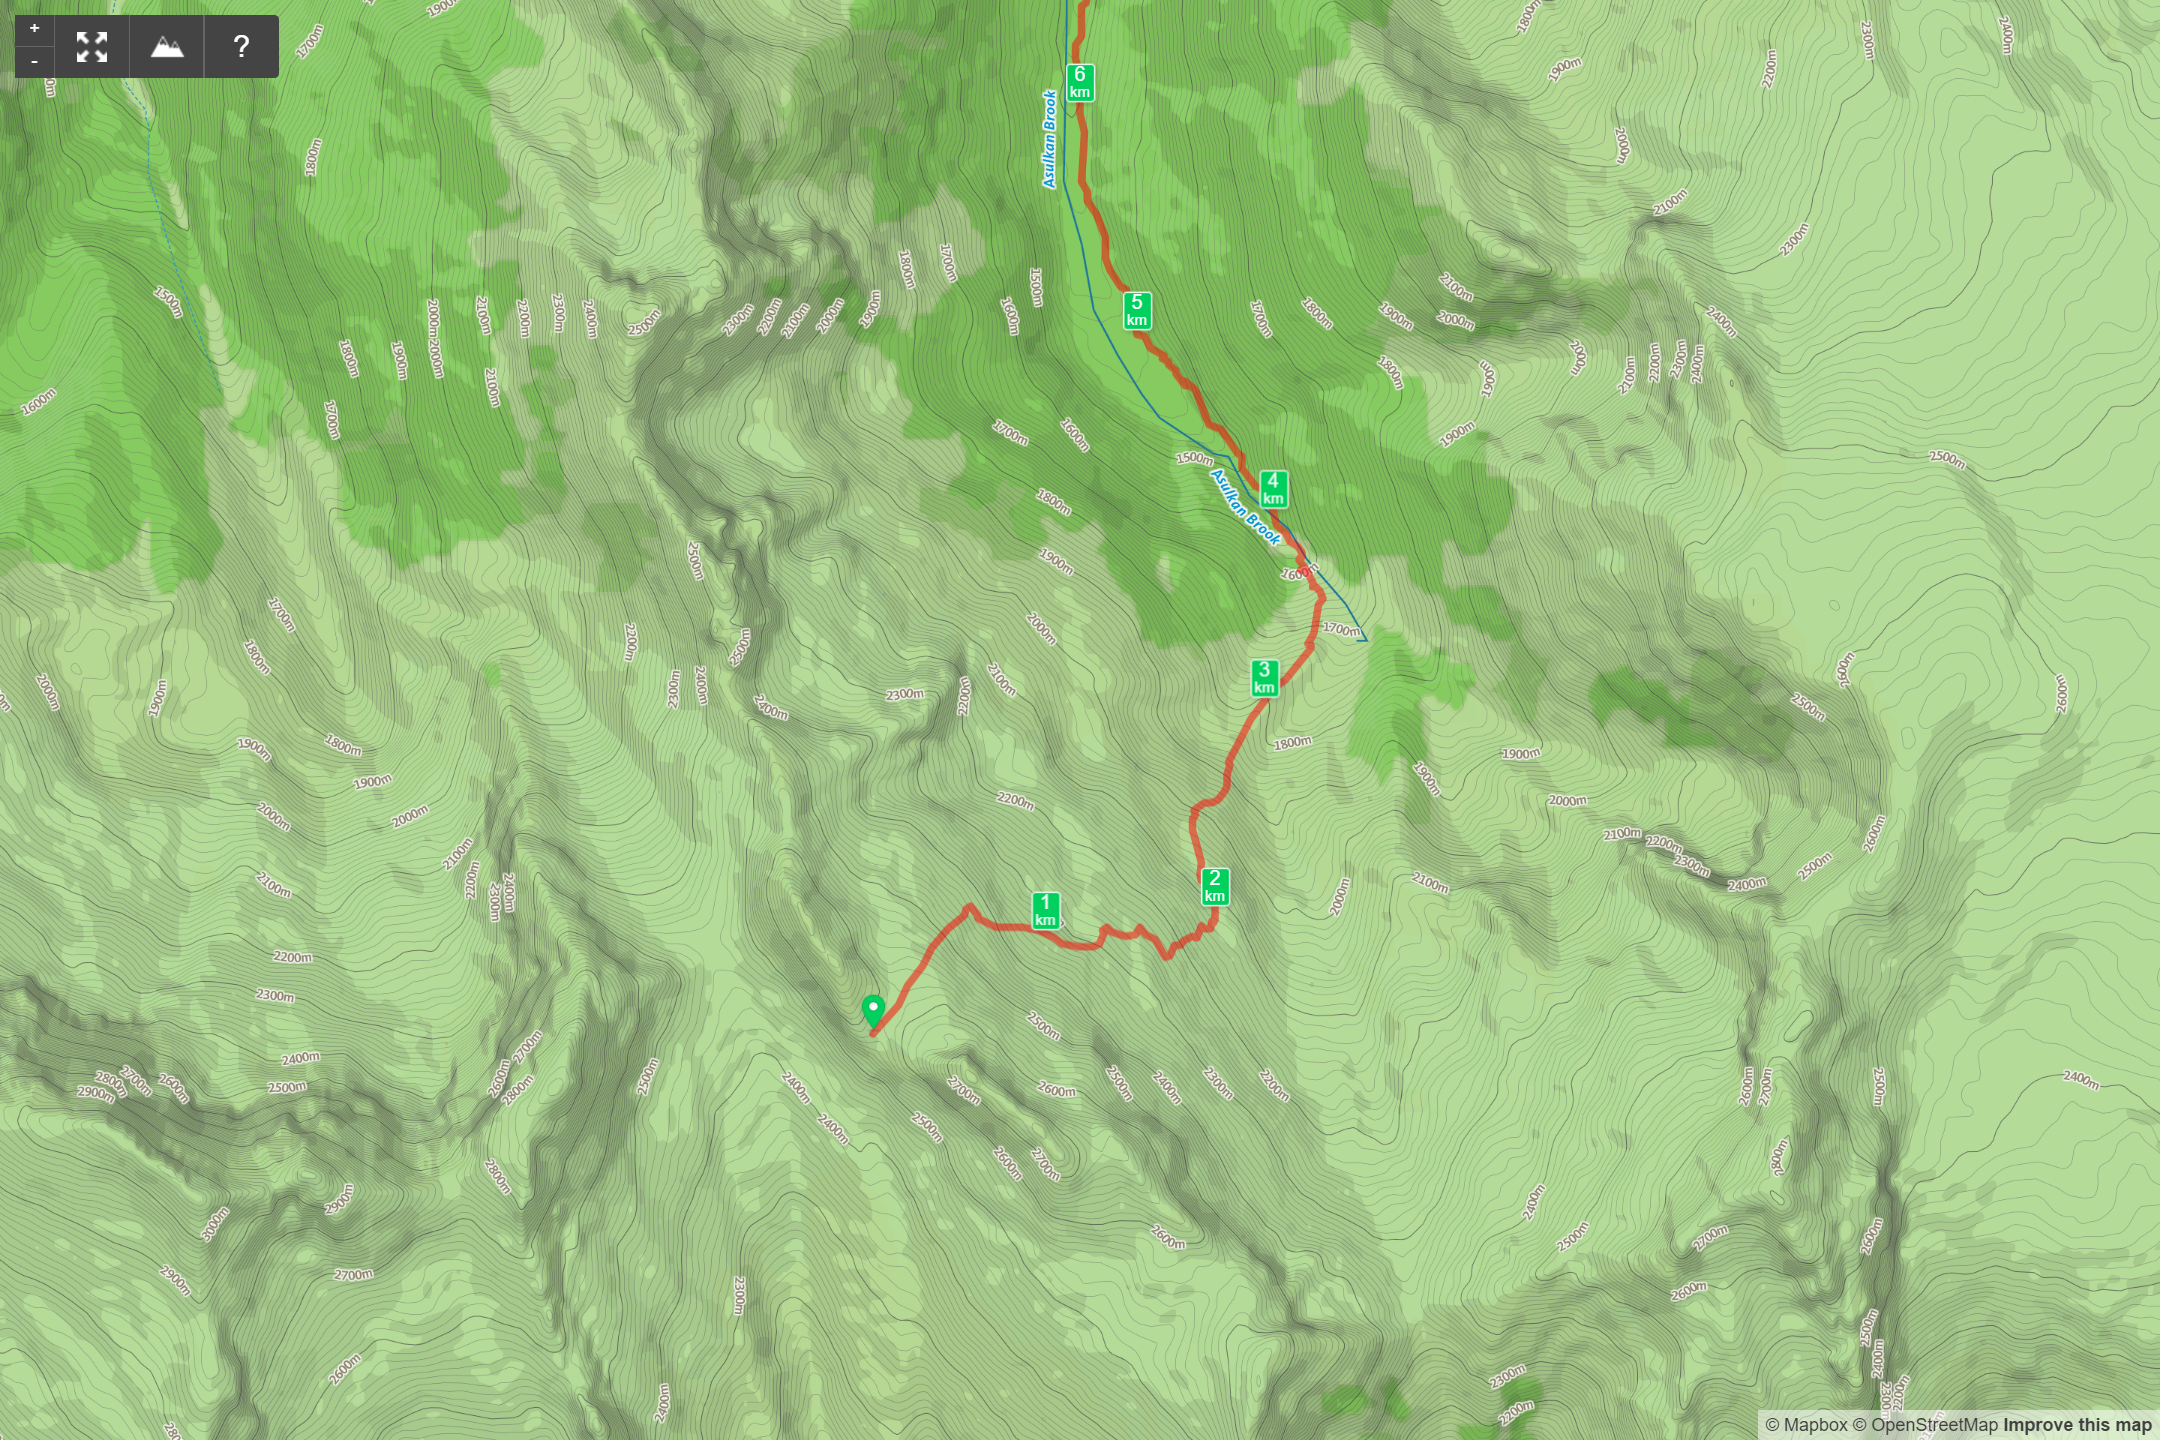
Upper River Crossing Route
What you need to know
Parks Canada requires:
- an entry pass that can be purchased at the entry gate.
- a back-country permit (or annual wilderness pass).
- Visiting the hut in winter? Then you must have a Winter Permit from Parks Canada. They have an intensive avalanche control program that uses heavy artillery to release at risk slopes.
I also recommend you stop by the Rogers Pass Discovery Centre, operated by Parks Canada. They have detailed records of snowfall and can give you valuable information about the conditions you might expect when crossing the glacier.
Pictures

¹Disclaimer:
I am not a guide. This text should be read for entertainment purposes only. You must be qualified to travel on terrain that is Class 3 or higher, or you should be accompanied by a guide or skilled mountaineer. DO NOT attempt this route (or any technical route) without the proper experience or in the absence of a qualified guide. I am not qualified to determine your ability to accomplish this route safely. This description exists solely as a reference and should not be construed as advice and cannot be relied upon in any way, shape, or form. Can you tell I work in the investment industry yet?